Exporting Log Files
If you are experiencing problems in executing a build, you can generate and export a log file that includes the output of your build, and send it to Incredibuild Support. Using these logs, Incredibuild Support can help you discover where errors occur in your specific build.
Before the Log Export: Re-Executing Problematic Builds with Special Commands
Before you generate and export log files, it is recommended to re-execute the problematic build with the switch -d1.
This command adds a lot of diagnostic information into the logs, but this causes the build to run slower. Add the -d1 switch before the build command. For example:
ib_console -d1 make -j 200
Viewing the Details of Execution Commands
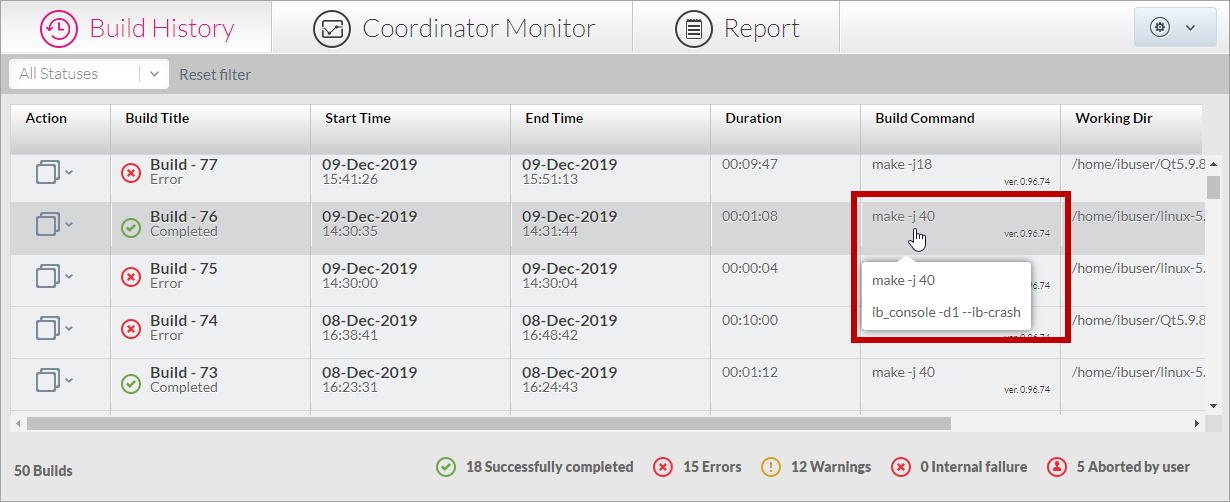
The Build History screen enables you to see if a build was executed with the -d1 and --ib-crash commands.
> To view the details of the execution commands of a build:
-
In the Build History screen, locate your required build, and hover over the content of its Build Command column:
Exporting a Log File for the Entire Build
You can generate and export a log file for an entire build. The generated log file will include different data, according to the commands used for executing the build. Depending on the type of data you want to include in the log file, perform one of the following:
-
To export only the Build History data of a build – execute the build as usual.
-
To export additional internal information on a build – execute the build with the -d1 command, and optionally with the --ib-crash command as well.
> To export a log file for the entire build:
-
Execute the build using the -d1 command, as follows:
ib_console -d1 <Your_Build_Tool_Command> <Multiprocessing_Command> <Number_of_Processes_to_Run_in_Parallel >
Notes:
- If you want the log file to include only the Build History data, you can execute the build as usual, without the -d1 command.
- If your build crashes, add the --ib-crash command after the -d1 command.
For example:
ib_console -d1 make -j 200
-
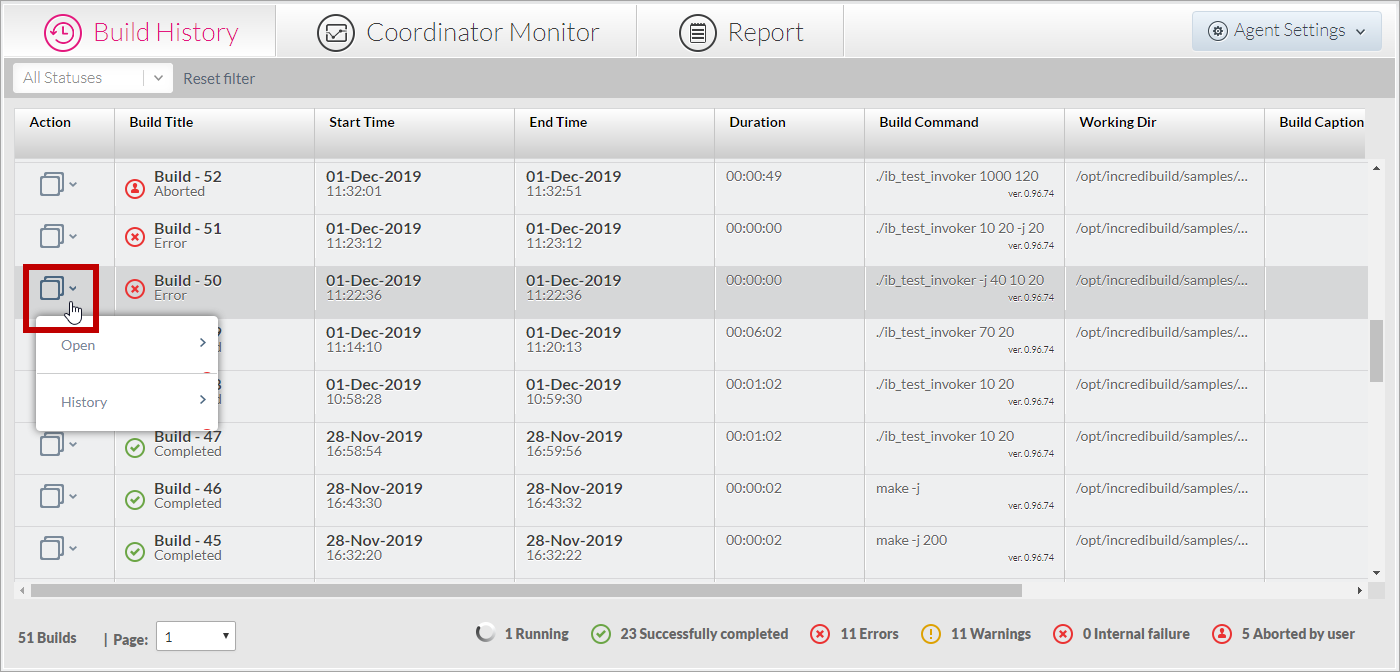
In the Build History screen, locate the build whose log file you want to export. Then, and click its Action button on the Action column:
-
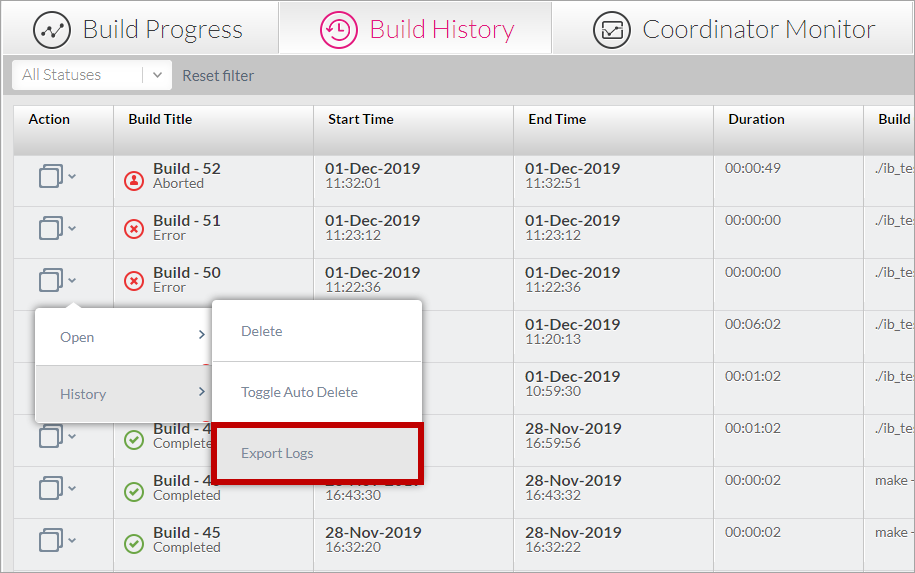
On the Action menu, select History -> Export Logs:
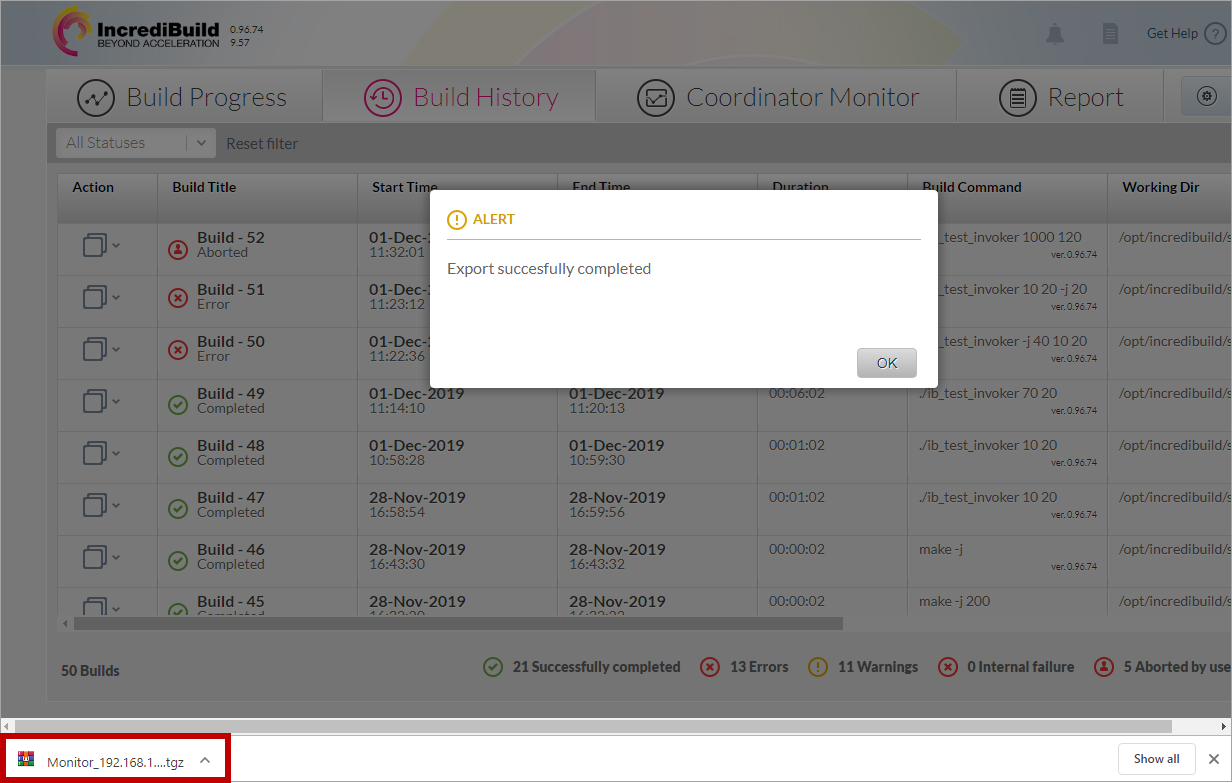
A confirmation message appears, informing you that the log export was completed successfully.
The log file is downloaded to your machine:
You can now send the downloaded log file to Incredibuild Support.
Exporting a Log File for a Specific Process
In addition to exporting a log file for an entire build, you can generate and export a log file for a specific process that is a part of an executed build. In order to export a log file for a specific process, you need to execute its build using the -d1 command. Without the -d1 command, no log data will be generated for individual processes.
> To export a log file for a specific process that is a part of a build:
-
Execute the build using the -d1 command, as follows:
ib_console -d1 <Your_Build_Tool_Command> <Multiprocessing_Command> <Number_of_Processes_to_Run_in_Parallel >
The build is executed.
-
In the Build History screen, double-click the required build.
The build is displayed in the Build Progress screen.
-
In the Build Progress screen – Graphical View tab, locate in the Build Progress Graph area the process whose log you want to export, and click it:
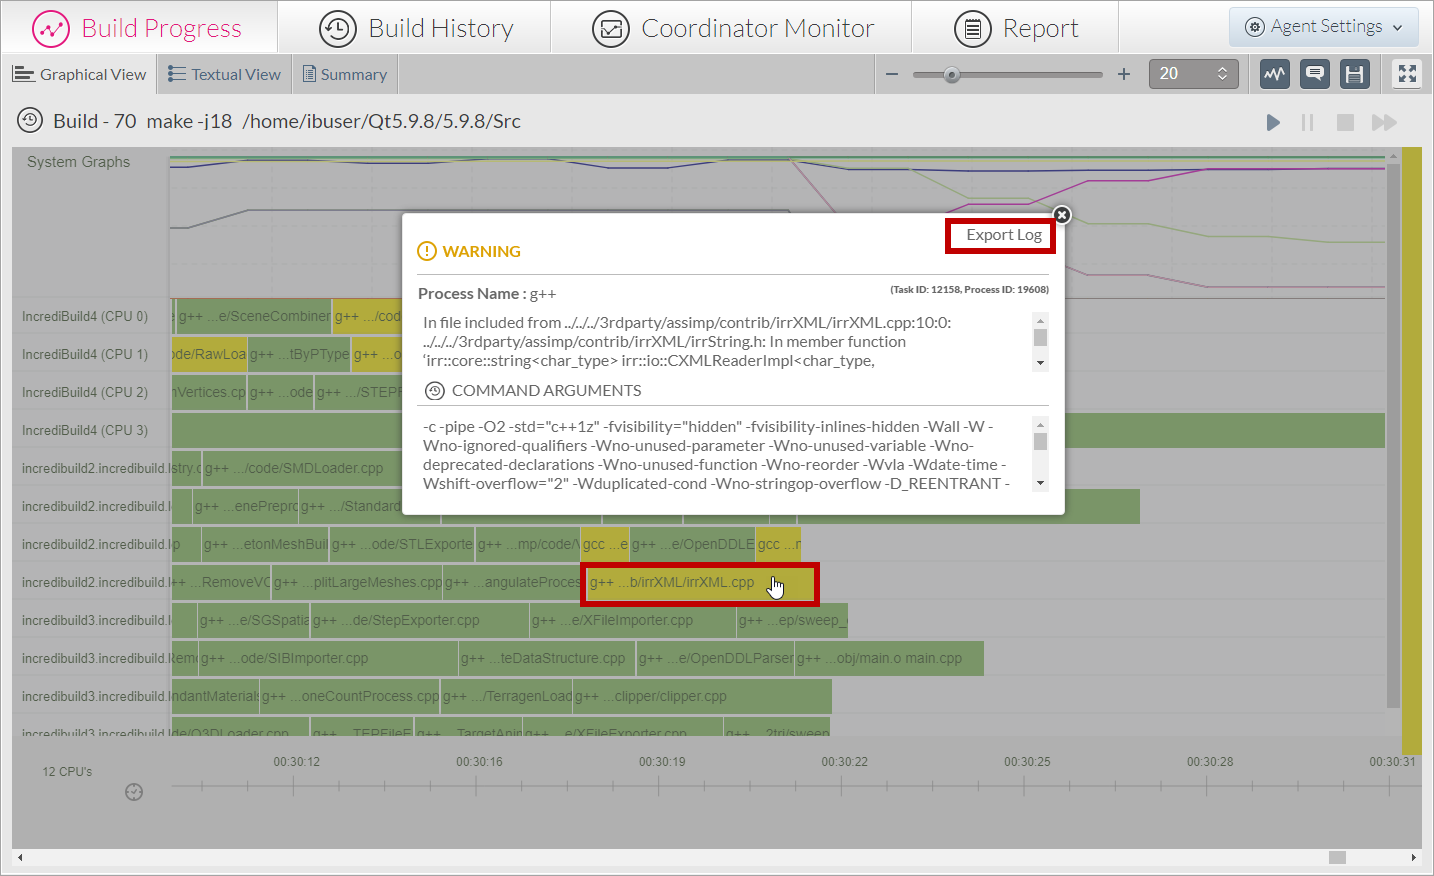
An Information message appears, containing additional details on the selected process.
-
On the Information message, click the Export Log option to generate the log.
The log file is downloaded to your machine, and you can now send it to Incredibuild Support.
Sending Logs to Incredibuild Support
Logs should be sent to Incredibuild Support in one of the following ways:
-
Submit a Linux support ticket via the Support site.
-
Send an email to the Linux Support team:support@Incredibuild.com