Build Cache - Advanced New Project Workflow
This feature is only available in Incredibuild's Enterprise and Business Plans and is currently in limited availability. For more details, speak to your Customer Success Representative.
This is an advanced procedure to add Build Cache to a new project. It guides you through the best practices to ensure that you get the most optimal results from Build Cache. If you have multiple projects, repeat this procedure for each project.
Workflow Overview
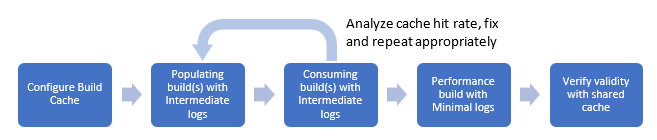
After the initial configuration, the workflow involves running your project a few times to fine tune Build Cache behavior and improve the cache hit rates. We can then measure how much time was saved on multiple machines, using both local and shared cache.
In some extreme cases it is possible you will need to examine some of that code. Make sure you have access to the project source code or have someone else support you if the need comes.
Note: If you are running this workflow on virtual machines, make sure they are not destroyed at the end of each build to allow you to save the Build Monitor files.
Build Monitor Files
Collect and save all the Build Monitor files produced in the procedure. Make sure to name them appropriately so that you can identify the project, initiator, and caching status (disabled, cold, hot).
We recommend that you deliver the Build Monitor files to Incredibuild for further analysis (even if there are no tech issues). This will minimize further friction when you escalate issues in the future, for example, so Incredibuild support team can compare what worked before vs. now. Your assigned Solution Architect or Customer Success Manager will provide a folder at https://incredibuild.files.com for you to upload all the relevant files.
Terminology
-
Disabled: Builds that run with distribution only.
-
Cold: The initial status of the cache, when it does not contain any artifacts generated by the current project.
-
Hot: The desired status of the cache after running the first build on a cold cache, when it contains the artifacts generated by the current project.
Configure Build Cache (local cache)
-
Allocate Build Cache on the Initiator you will be using for this process.
-
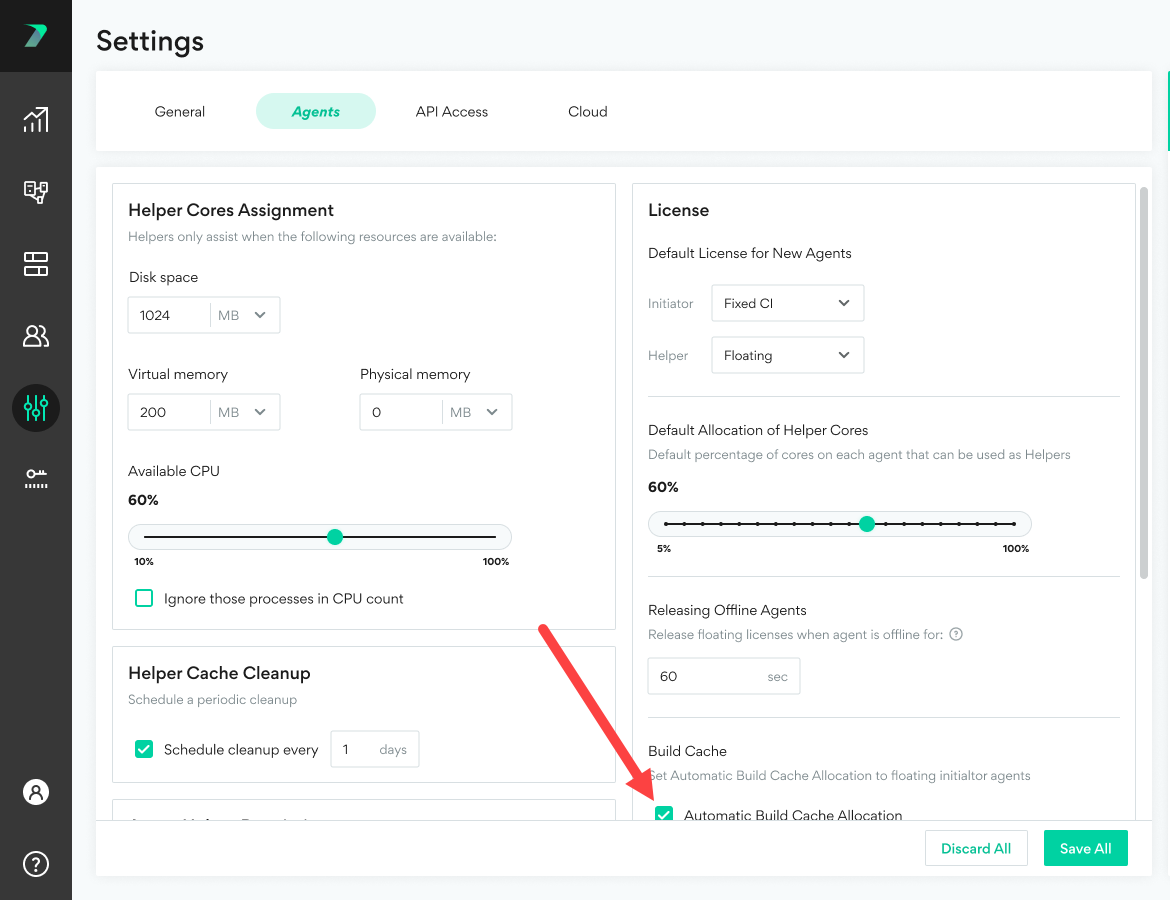
If you are using floating Initiators, make sure they use Build Cache by default. Go to the Settings page, select the Agents tab, and check the Automatic Build Cache Allocation option

-
If you are using fixed Initiator Agents:
-
Go to Coordinator > Agent List.
-
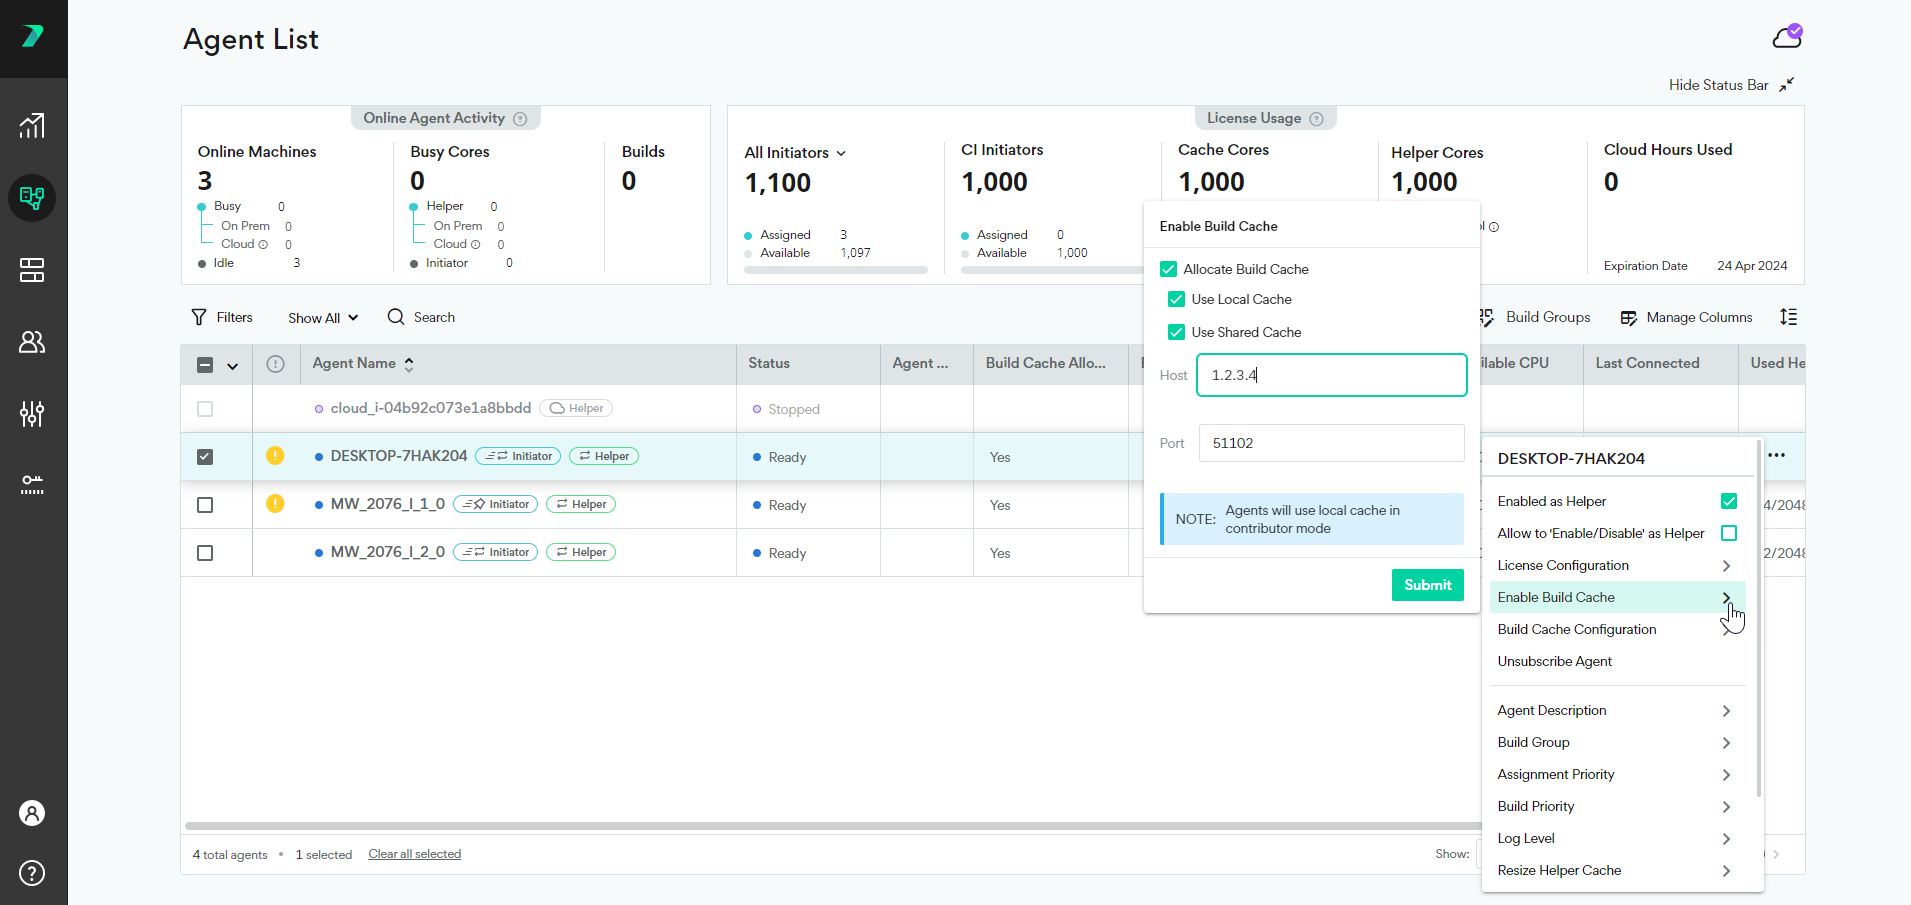
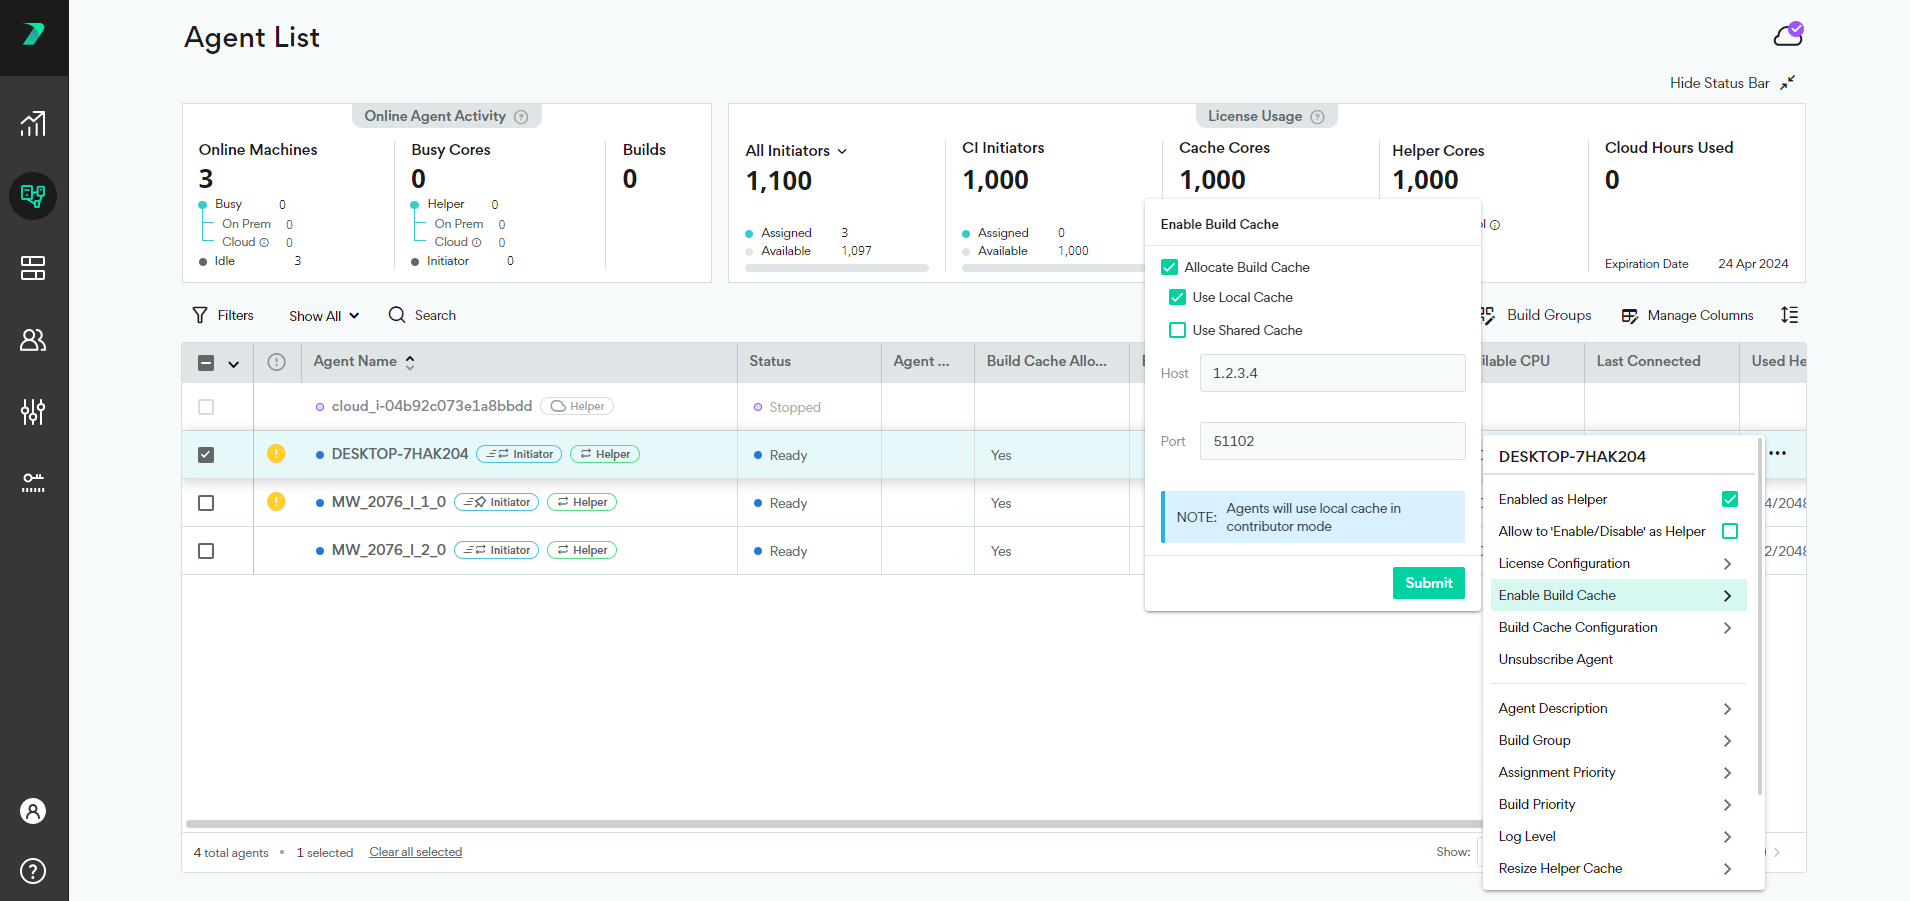
Right click the Initiator that you will be using for the process and click Enable Build Cache > Allocate Build Cache.

-
-
-
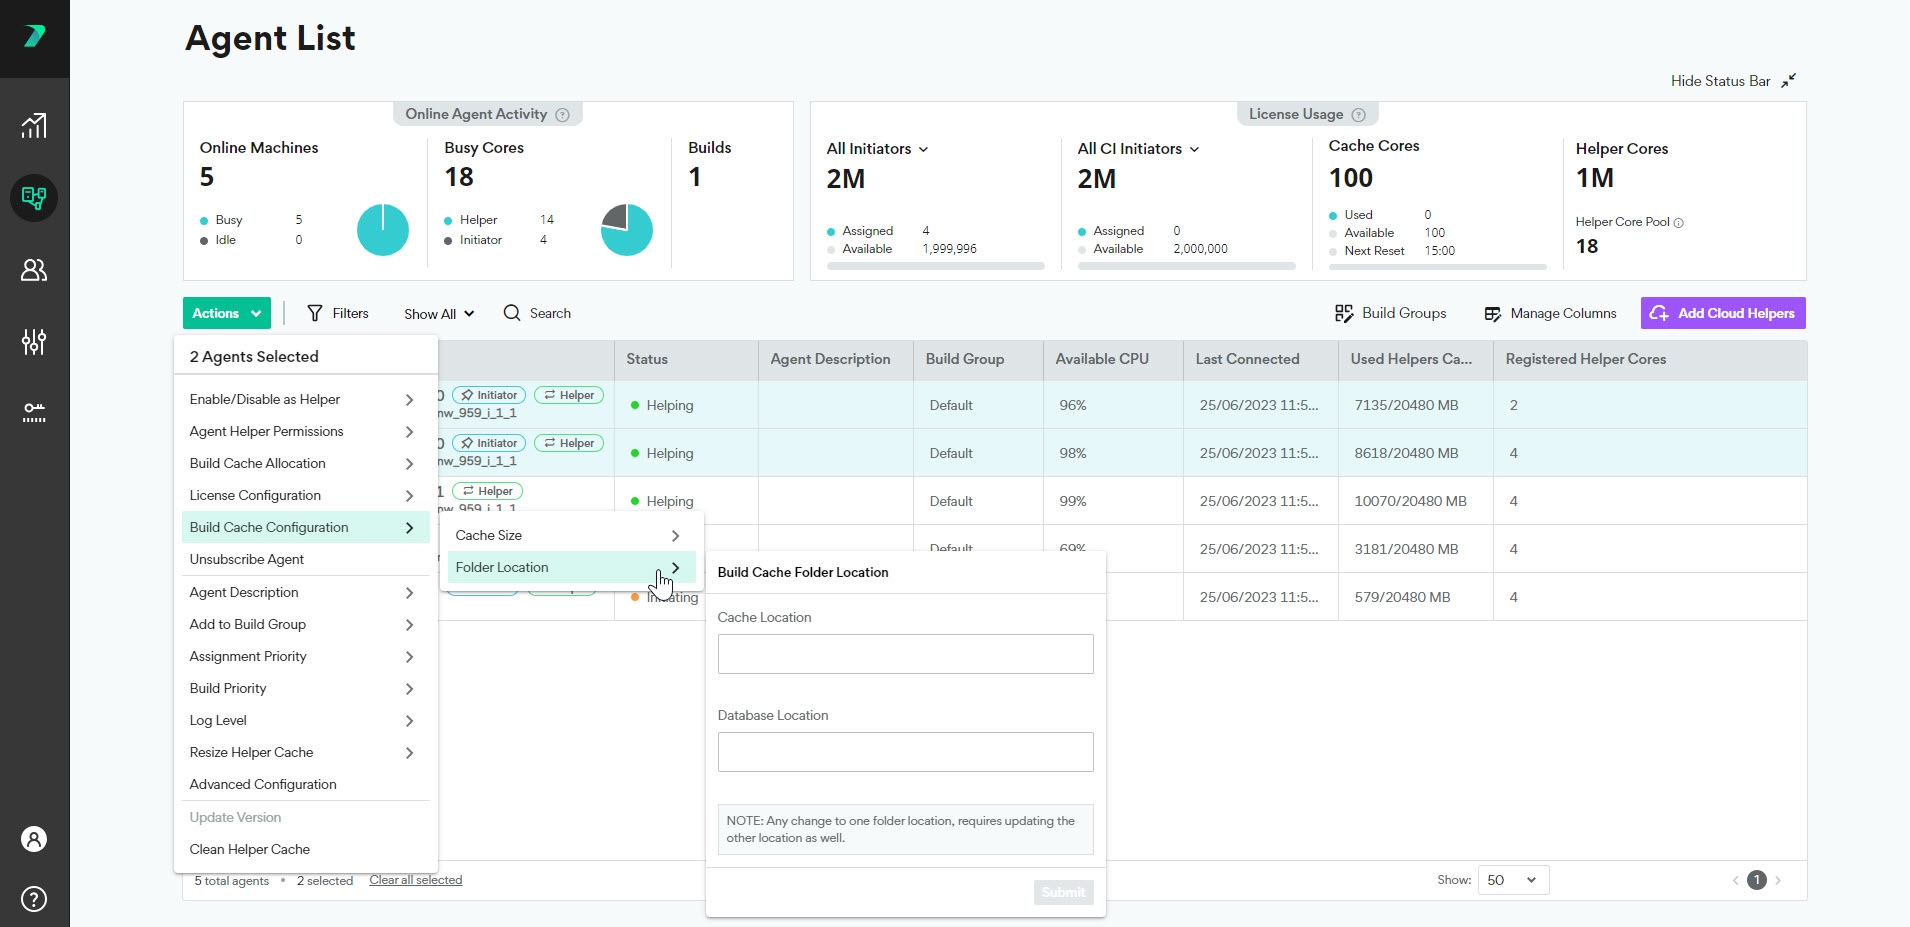
Right click the Initiator and click Build Cache Configuration and set the cache size and location . The size limit should be 2-3 times the size of the output of all of the builds that will contribute to this file cache, but the requirements may vary depending on your environment.

Run the Cache Population Build
-
Run an initial build, with Release configuration.
-
Examine the monitor file and in the build output tab, check the size of the objects stored in the cache.
Find the line with “Submitted items size”:

If the submitted items size is more than the initial estimate (see step 7), revalidate the required cache size and increase appropriately.
-
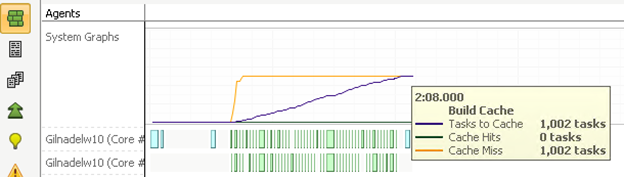
In the bar chart, make sure the cache misses (which are expected) at the end of the build match the “tasks to cache” value (using the system graph)

If these values are not the same, there’s a good chance that the build output is larger than the allocated cache: increase the cache to 2X the reported size and repeat this build until it is cached entirely.
-
In the messages tab, examine any warnings or errors. If there are any failures or unexplained warnings, or if the “tasks to cache” does not match the “cache misses”, contact your assigned Solution Architect or Customer Success Manager.

Run the Cache Consuming Build
-
Run another full build with the hot cache. Use the same initiator, same project, no code changes, same project settings and configuration.
If you cannot run the build with the exact same code, run the build as soon as possible, to minimize the code changes (keep in mind that code changes will cause cache-miss)
-
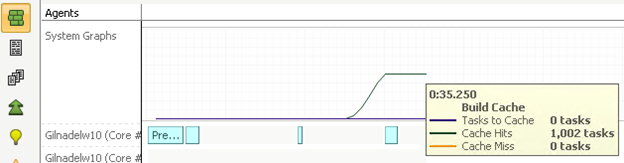
Examine the Build Monitor file and verify the cache hits at the end of the build match the “tasks to cache” from the previous build.

-
Examine the Build Cache savings in the build output and in the Coordinator Manager (for on-prem license).

-
In the messages tab, examine any warnings or errors. If the cache hits are low, examine the hit/miss report and other details in the Build Cache tab. You can also contact your assigned Solution Architect or Customer Success Manager and provide them with all Build Monitor files. For Unreal Engine, the cache hits are typically between 50%-90%. For other projects, cache hit rates vary wildly.
-
Implement the suggestions you received and repeat the cache-population and cache-consuming builds until you are satisfied with the hit rate.

Examine Build Cache Acceleration
-
Examine the decrease in build duration.
-
Examine the decrease in the number of helpers required and the time they spent helping. Fewer helpers mean you can build more often with the same hardware.
Test Shared Cache
-
Use another Initiator that will act as a Build Cache client using the original Initiator as shared cache. Note: this is only relevant for testing the new project with shared cache, do not use existing Initiators for shared cache in production environments.
-
Make sure Visual Studio installed on both Agents is the same version (Build Cache will generate cache misses if code is compiled with different tool versions).
-
Repeat all procedures above on the new Initiator.
-
Run another build with the hot cache to see the operation of shared cache. Use the same project, no code changes, same project settings and configuration.
-
Examine the monitor file, verify the cache hits are high.
-
If the cache hits are low, contact your assigned Solution Architect or Customer Success Manager and provide them with all Build Monitor files
Enable Build Cache on Other Initiators
You are now ready to use and benefit from Build Cache for this project. You should enable it on any Initiator agents that will run this project.
-
Go to Coordinator > Agent List.
-
Select every initiator agent that you want to enable Build Cache.
-
Click Actions > Enable Build Cache > Allocate Build Cache. If you do not see this option, make sure the agents have Initiator licenses.
-
On each Initiator Agent machine in the Agent List, you can define if you want it to use a local cache, a remote cache, or both in the Enable Build Cache area.