User Management Integration with External System
This feature is only available in Incredibuild's Enterprise Plan.
You can integrate Incredibuild user management with an external user management system such as Active Directory. When enabled, you can log into Incredibuild with users defined in the external system, and Incredibuild authenticates the users by communicating directly with that system.
After enabling the integration, you can also use users defined locally in Incredibuild, but only those with the Grid Admin role.
Enabling the Integration for Active Directory
The following procedure was created using Active Directory 2022. The steps may differ in different versions.
-
In Active Directory, create three security groups to correspond to the three levels of user permissions in Incredibuild.
-
IB-Grid-Admins
-
IB-Group-Managers
-
IB-Viewers
-
-
In Active Directory, add user accounts to the security groups depending on the permissions you want them to have in Incredibuild.
-
Define a dedicated user for Incredibuild to use to validate users in your external user management system. This user does not need special permissions or roles. This user must have a password that does not periodically expire.
-
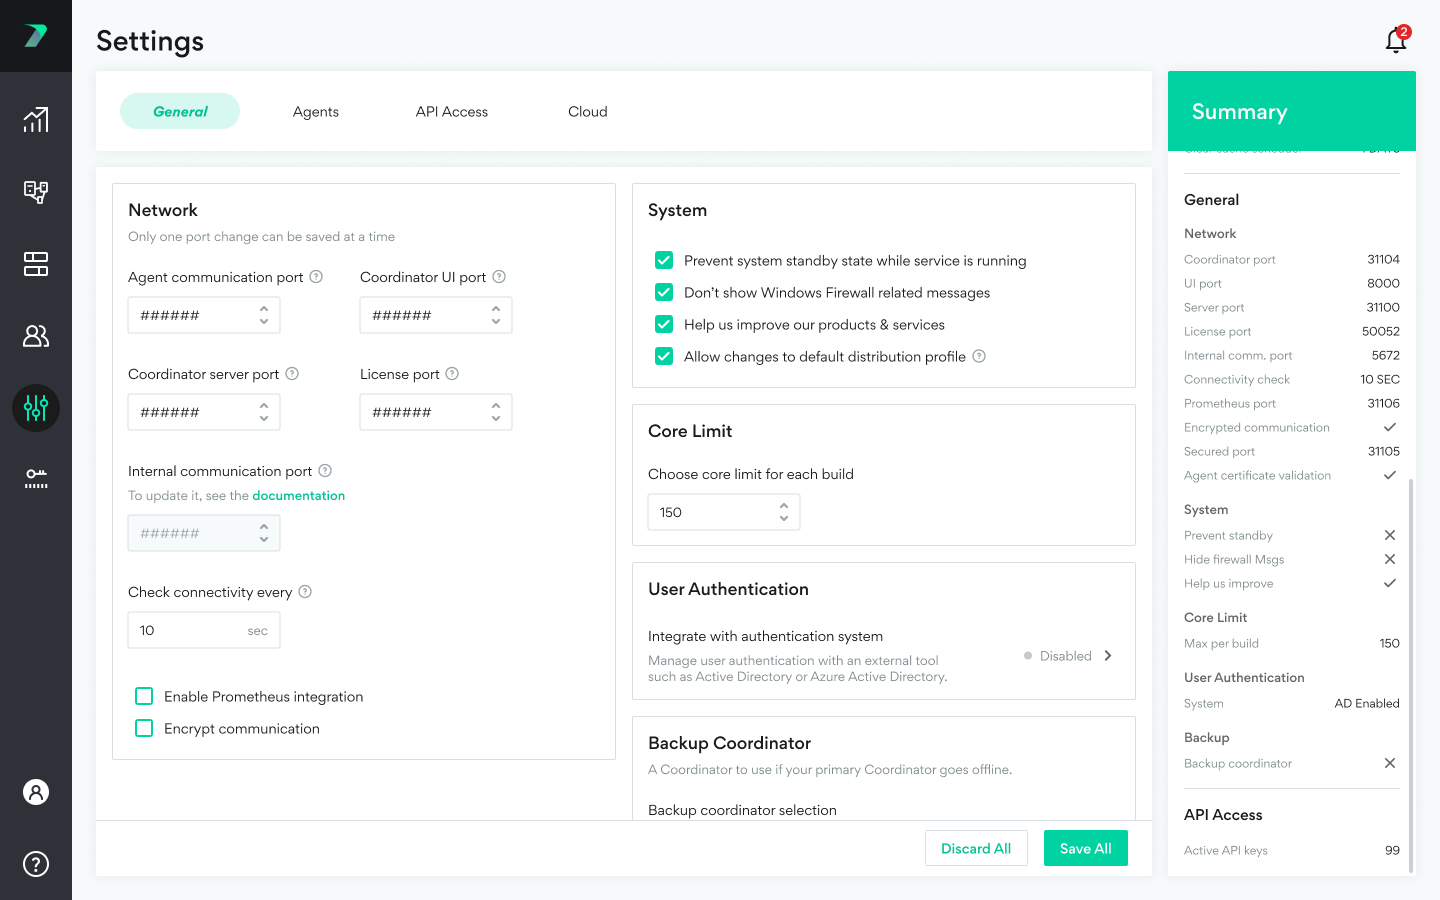
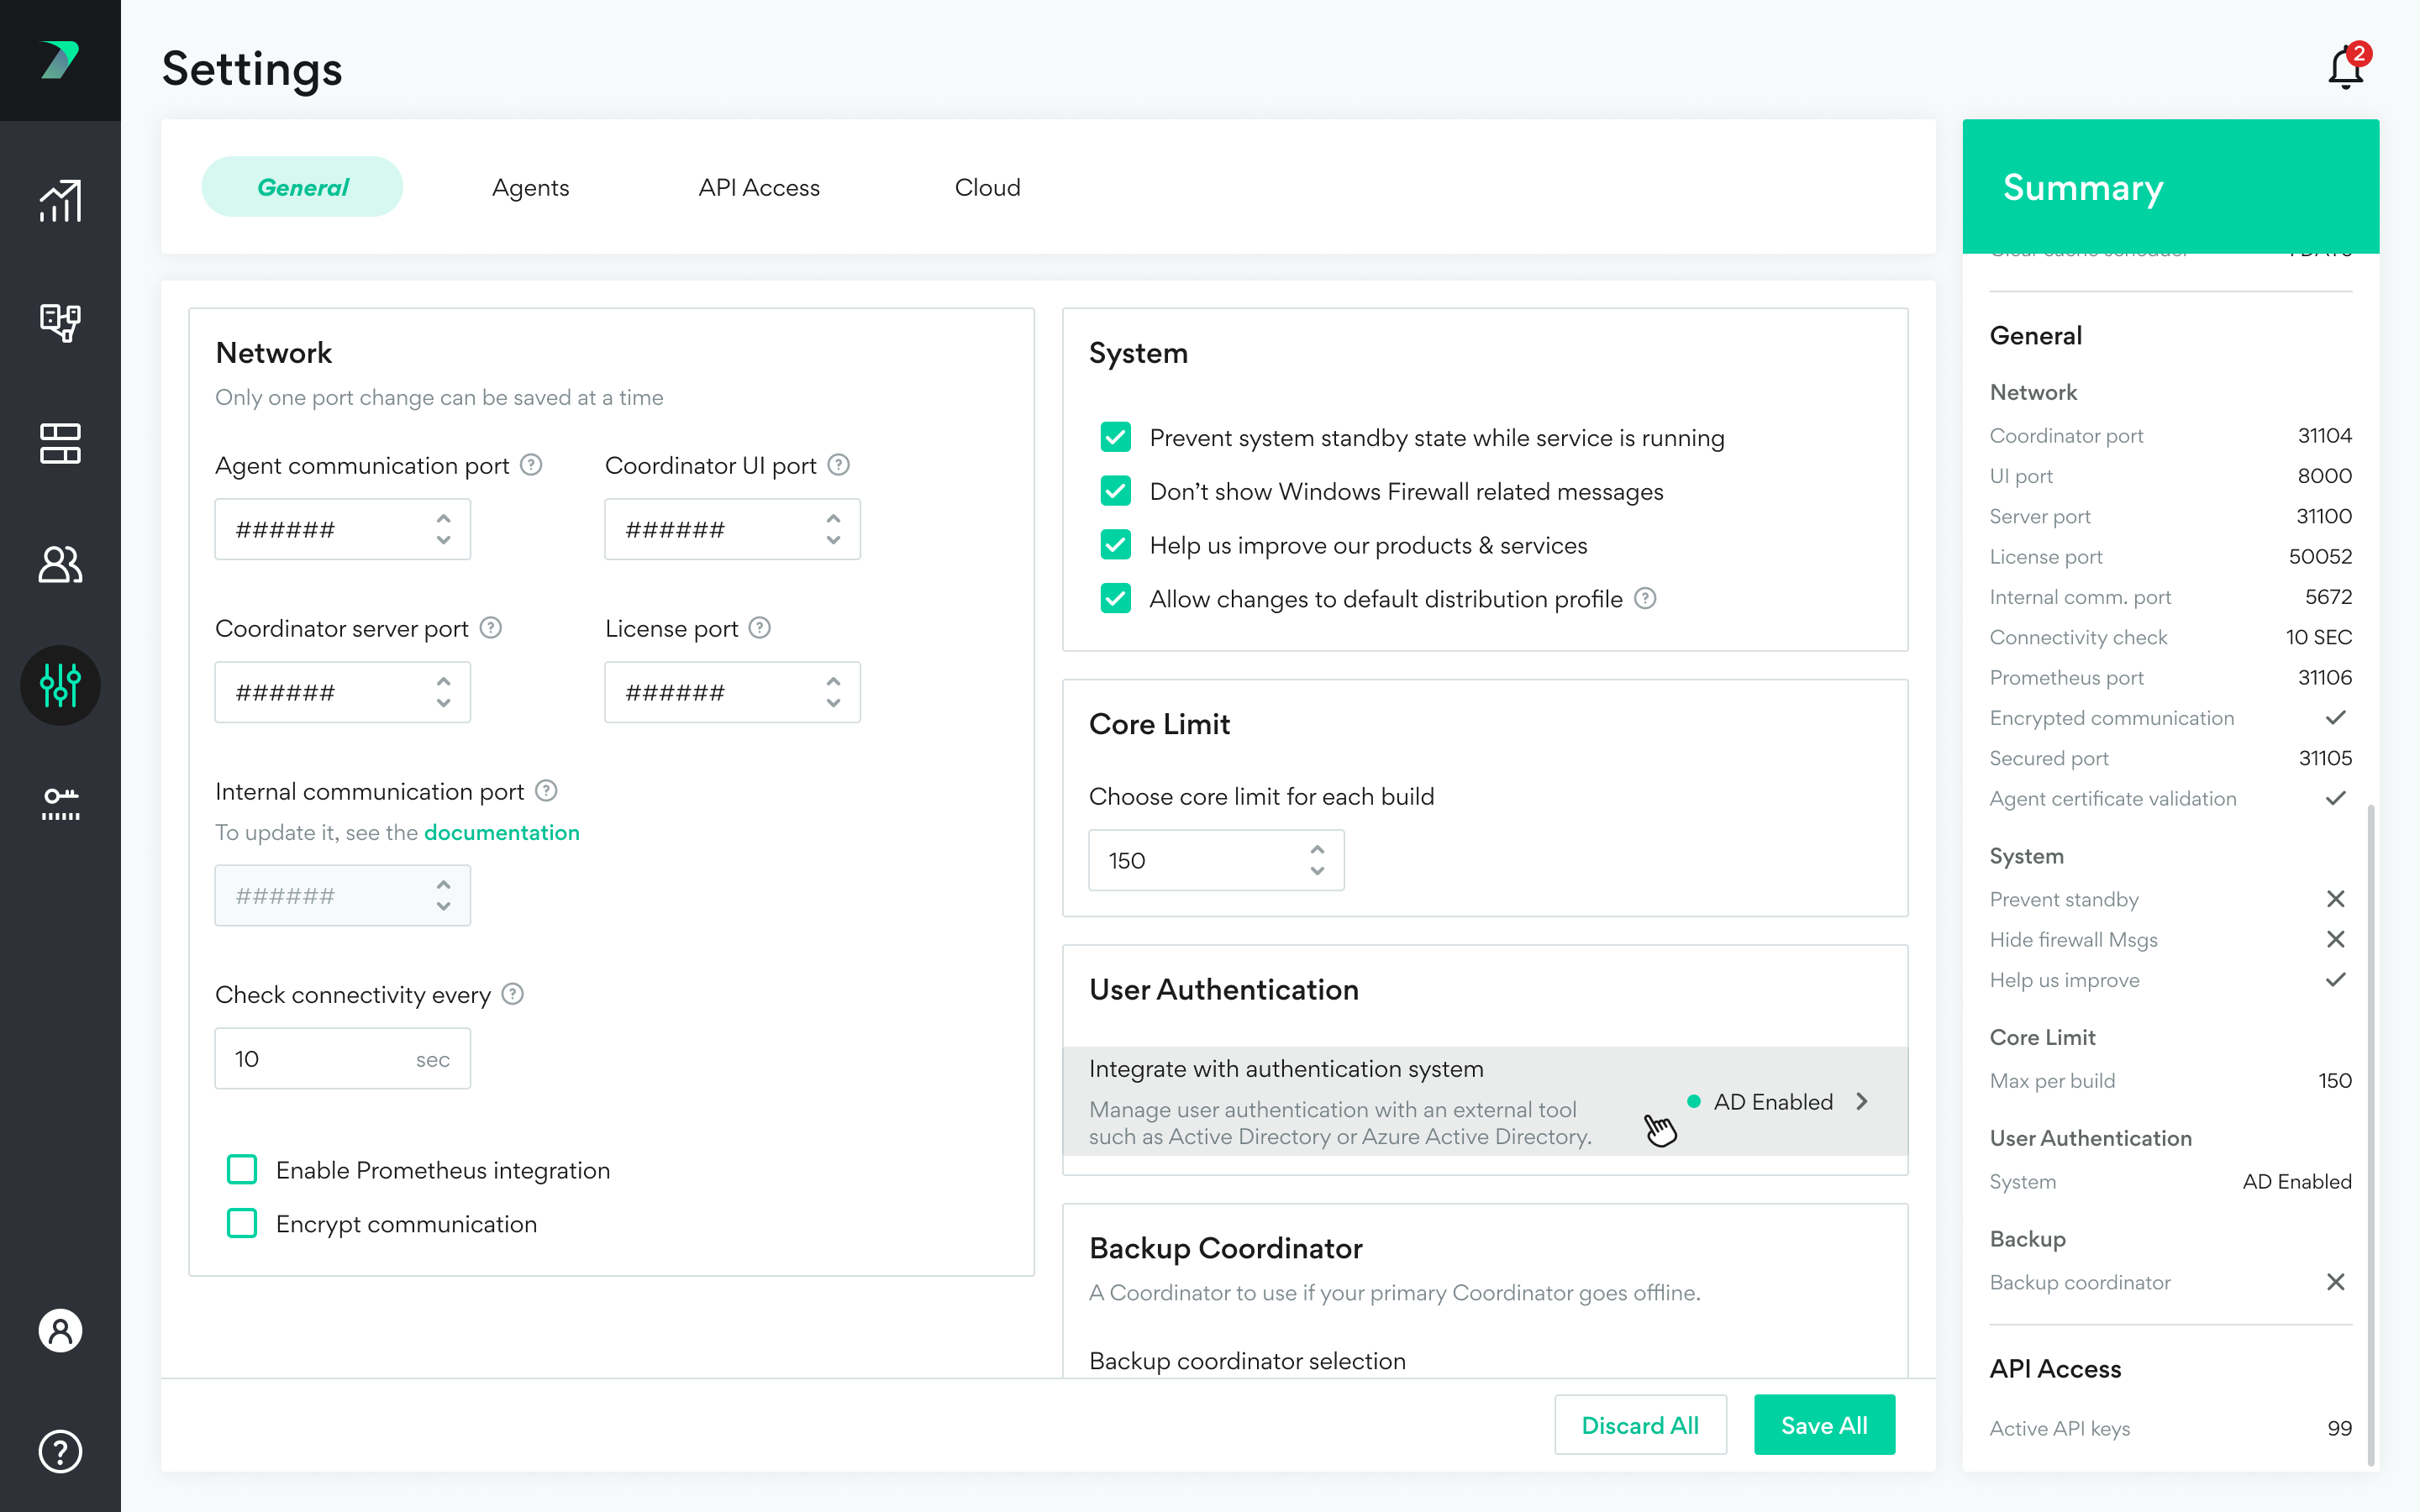
In Incredibuild, go to Settings > General > User Authentication and click Disabled.
-
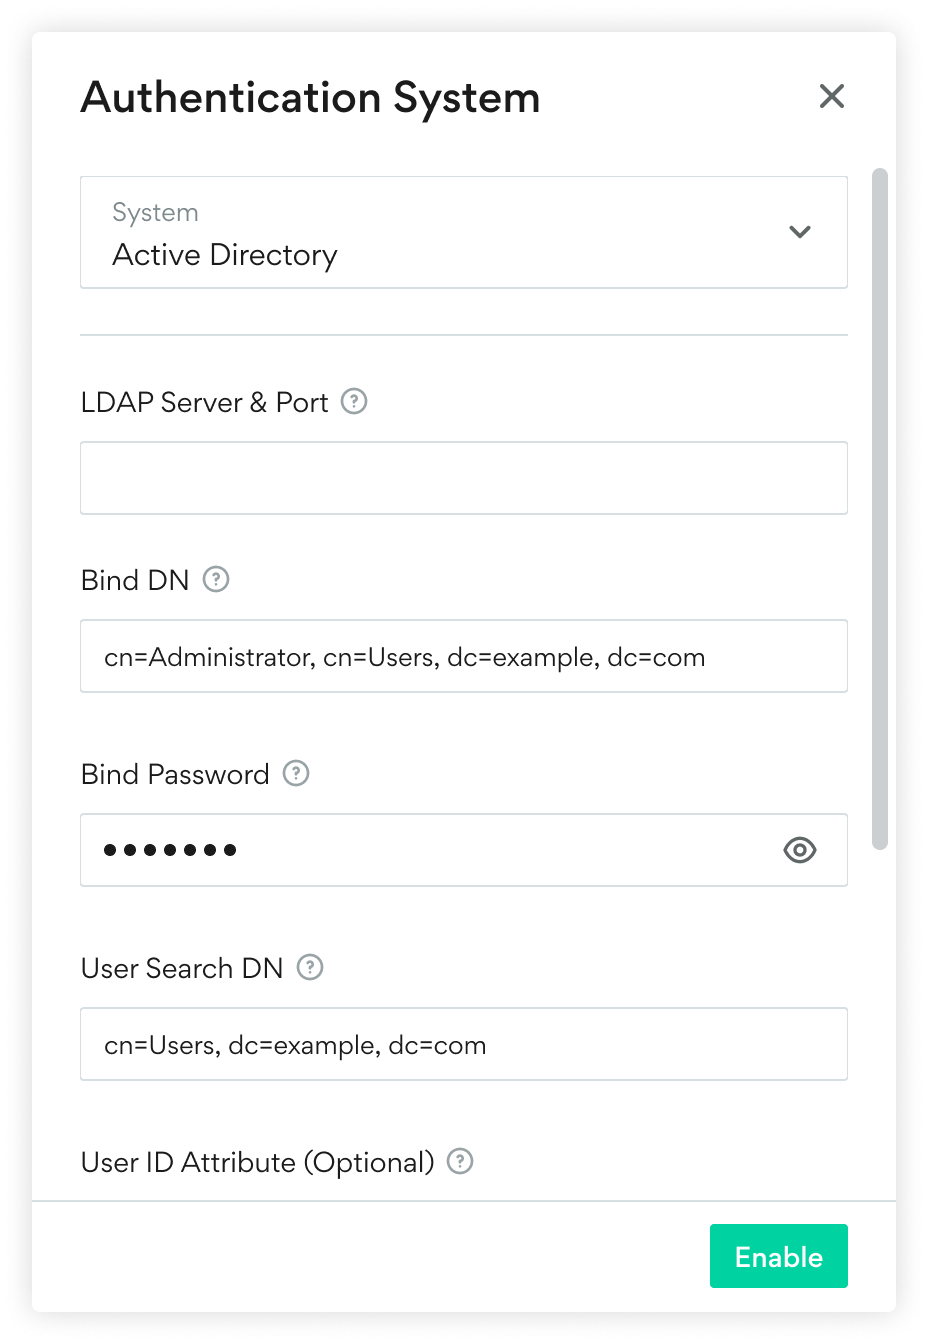
Select Active Directory and either LDAP or LDAPS depending on the protocol you want to use for this integration.
-
If you selected LDAPS:
-
The ldap server format must start with "ldaps" (e.g. ldaps://1.2.3.4:1234####)\
-
You need to enter the root certificate of the CA that issued the LDAPS certificate. If you have a certificate chain, copy/paste the certificates into one file and enter it here.
-
-
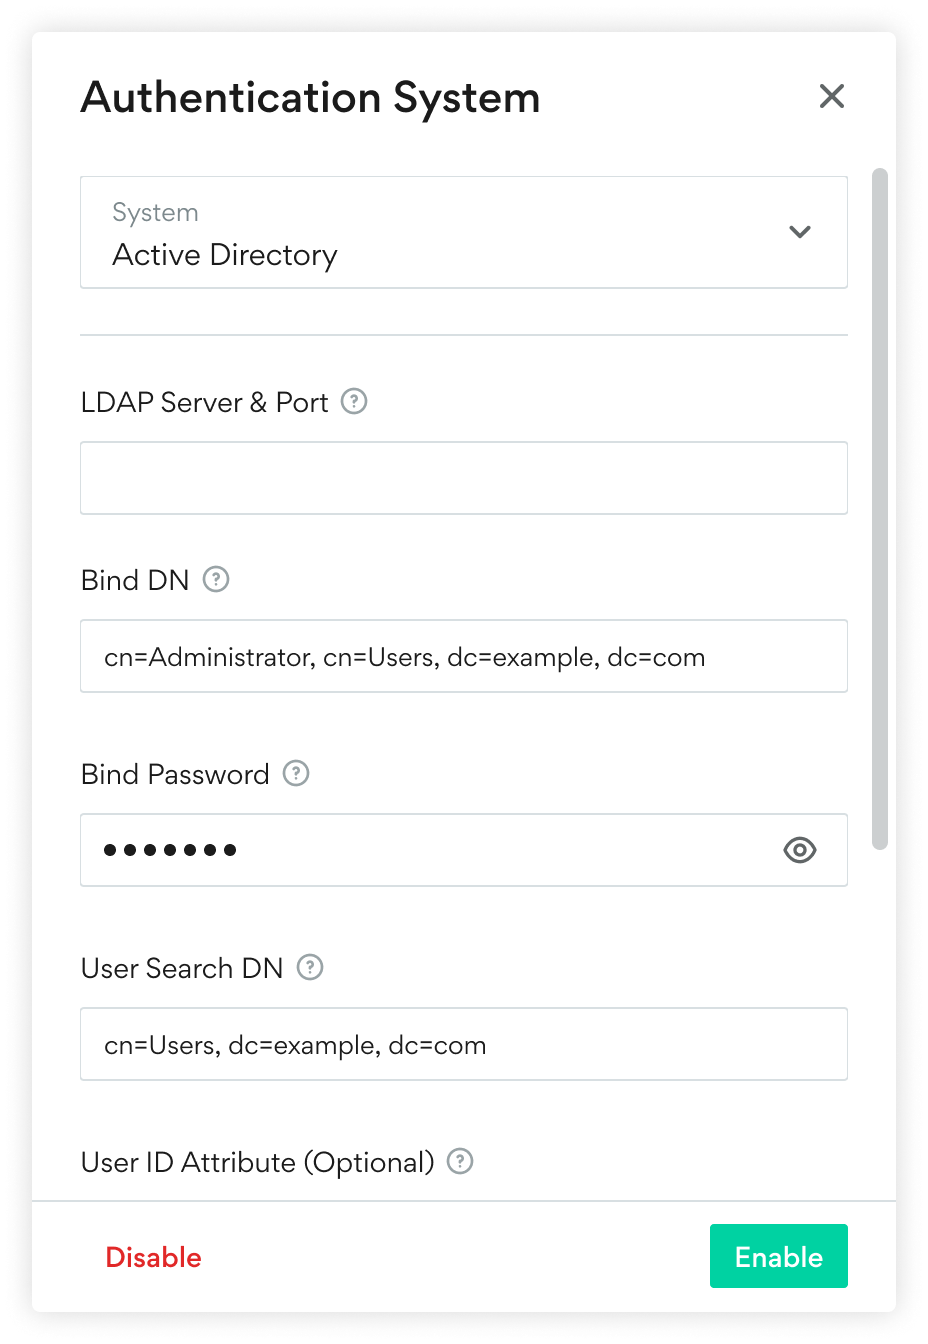
Enter the settings from your Active Directory account:
-
The LDAP(S) Server and Port should match the format "ldap://<server>:<port>". For example "ldap://localhost:389".
-
Enter the credentials of the dedicated user for Incredibuild to validate other users (created in step above) in the Bind DN (username in LDAP format) and Bind Password fields.
-
The User Search DN is the folder where Incredibuild searches to validate your users. It must be in LDAP format.
-
-
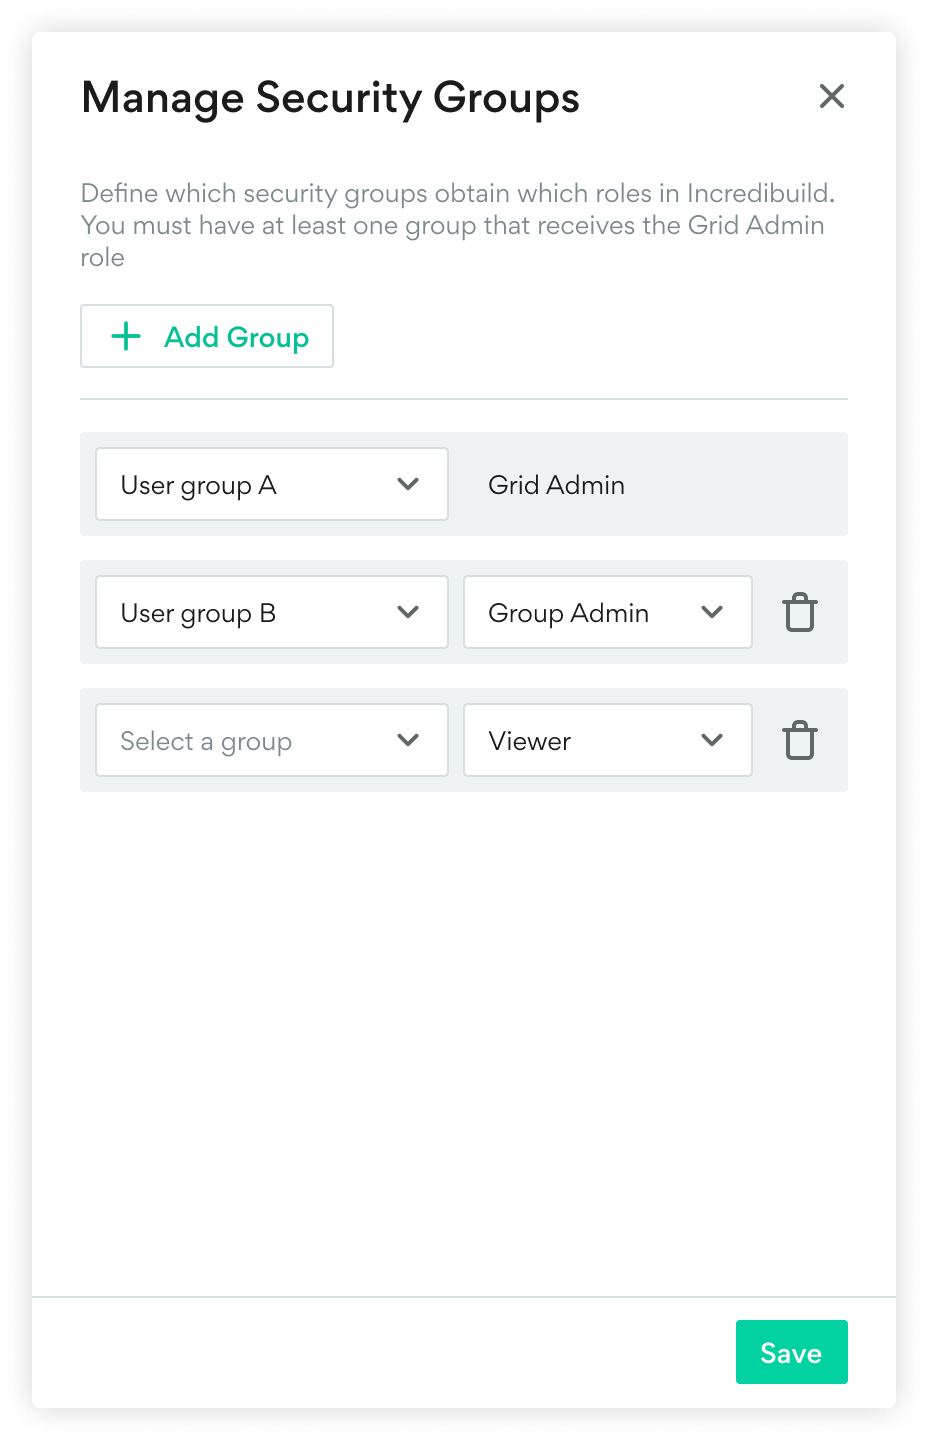
You can add as many user groups as you want in Incredibuild and assign them permissions:
Enabling the Integration for Microsoft Entra ID
Microsoft Entra ID was formerly called Azure Active Directory. The following procedure was created using Microsoft Entra ID's December 2023 release. The steps may vary slightly in future versions.
-
In Microsoft Entra ID, create three security groups to correspond to the three levels of user permissions in Incredibuild.
-
IB-Grid-Admins
-
IB-Group-Managers
-
IB-Viewers
-
-
In Microsoft Entra ID, add user accounts to the security groups depending on the permissions you want them to have in Incredibuild.
-
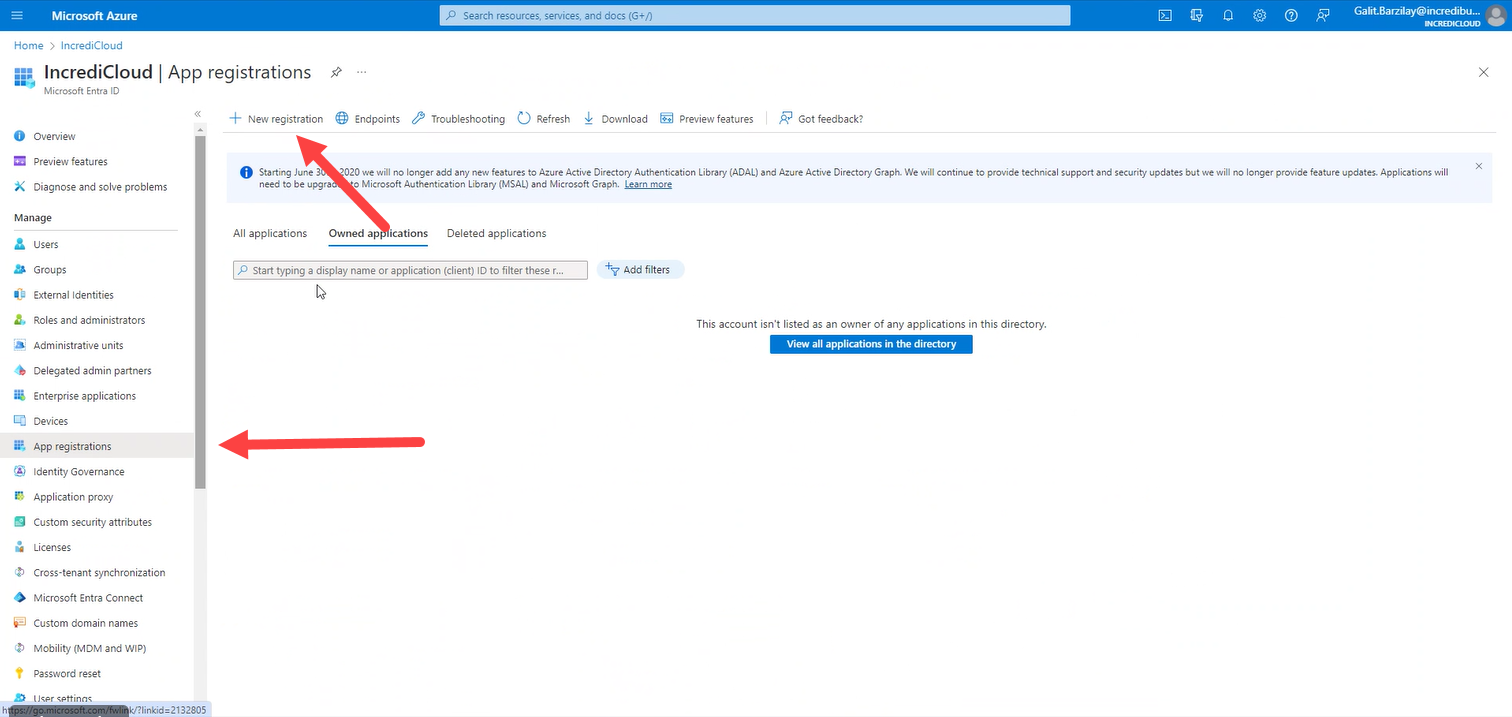
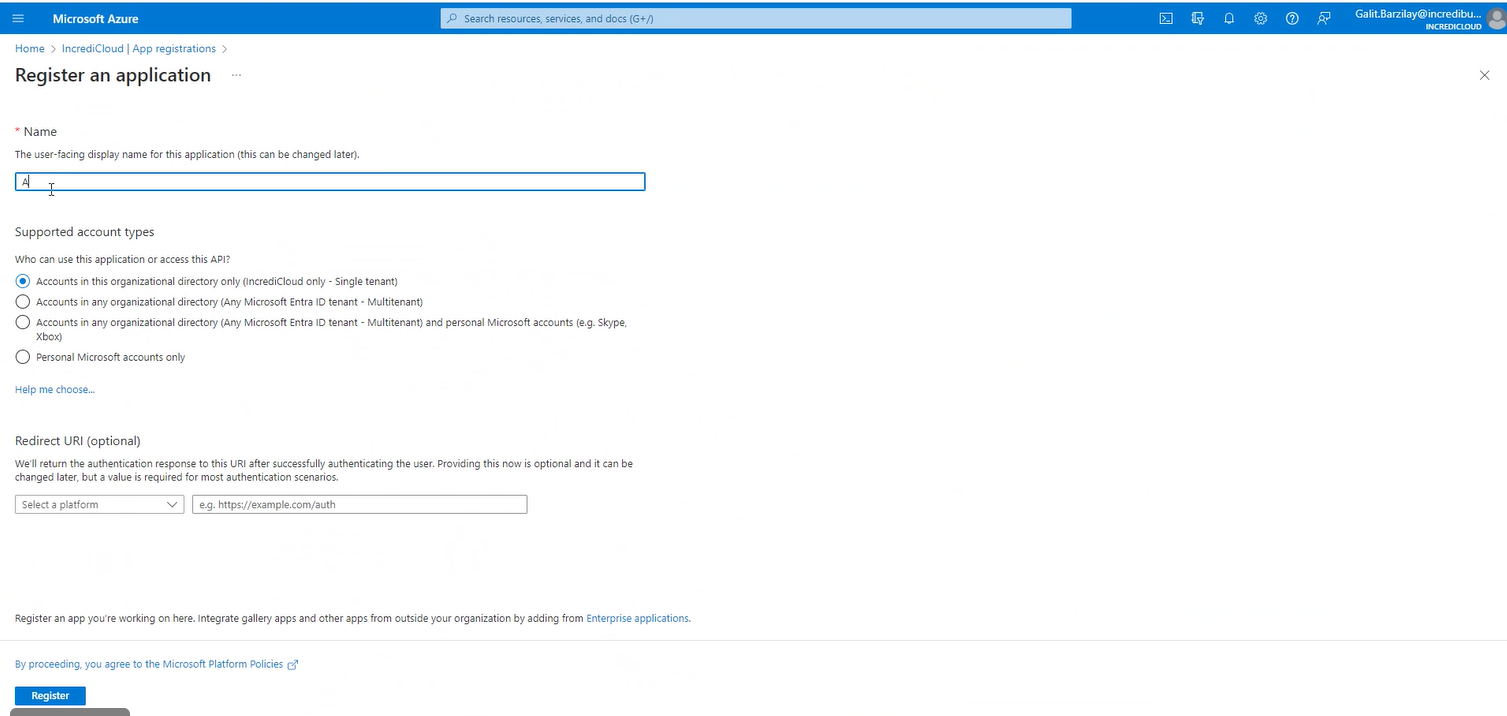
In Microsoft Entra ID, go to App Registrations > New Registration.
-
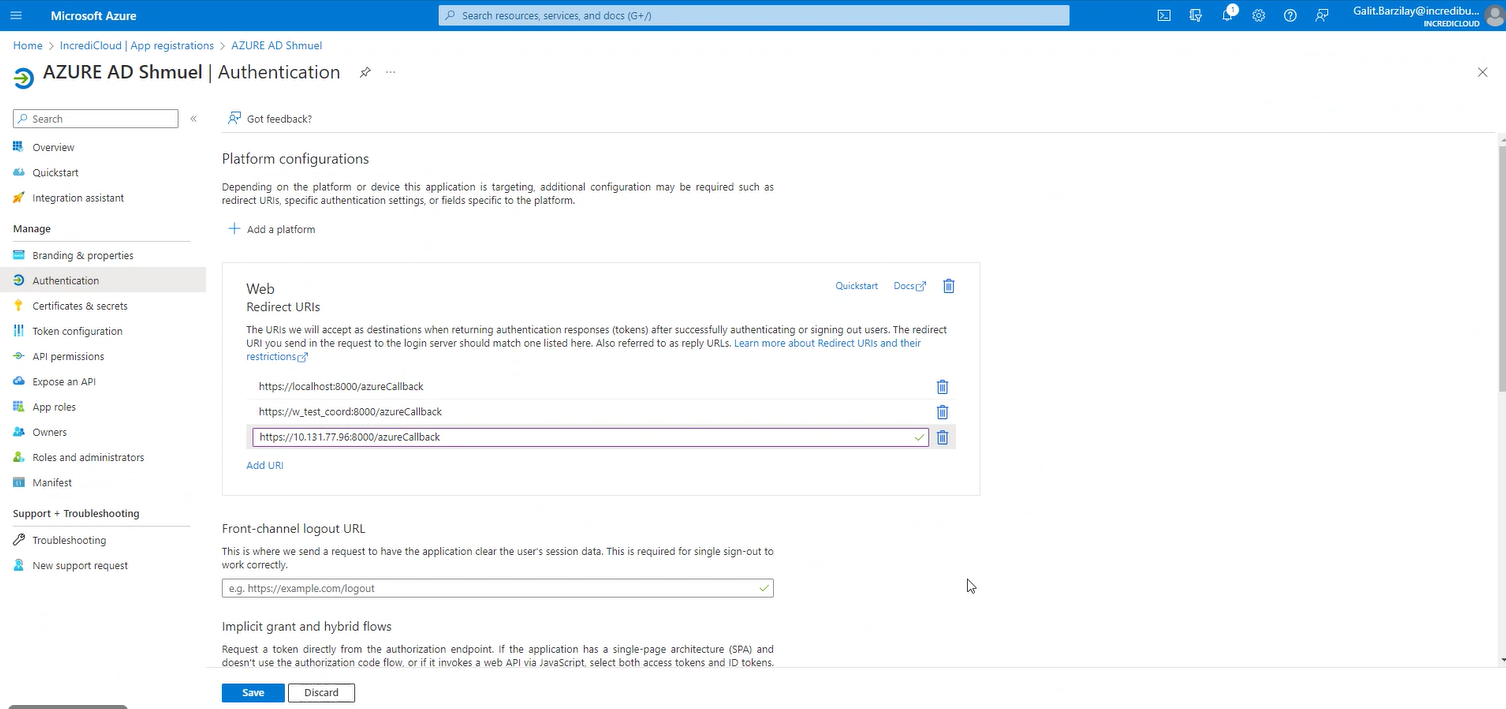
In the Authentication area, add two Redirect URI's:
-
https://<coordinator IP>:8000/azureCallback
-
https://<coordinator DNS name>:8000/azureCallback
-
-
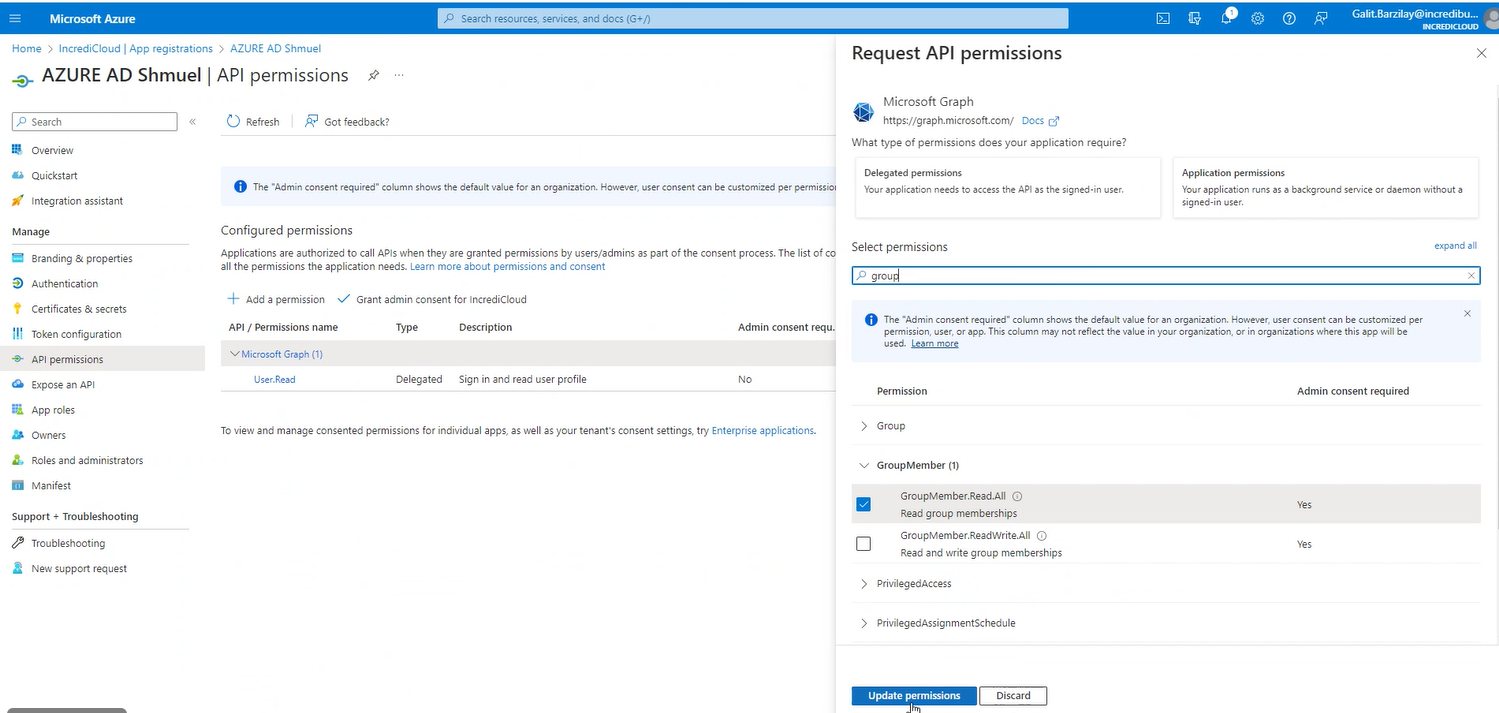
In the API Permissions area, click the Microsoft Graph permission and add the GroupMember.Read.All permission.
-
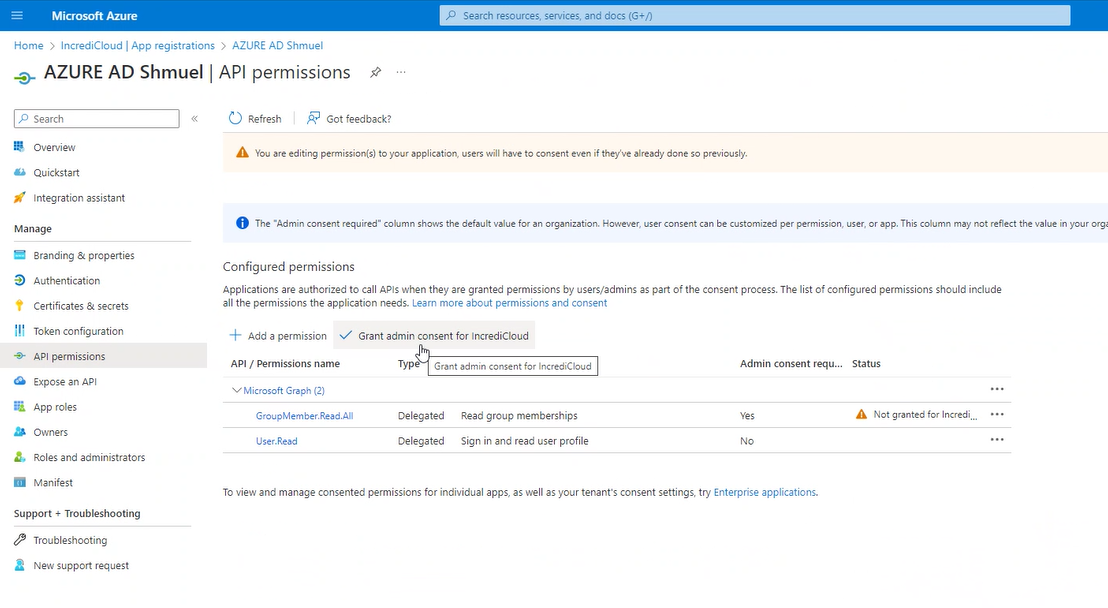
Click Grant admin consent for <your organization account>.
-
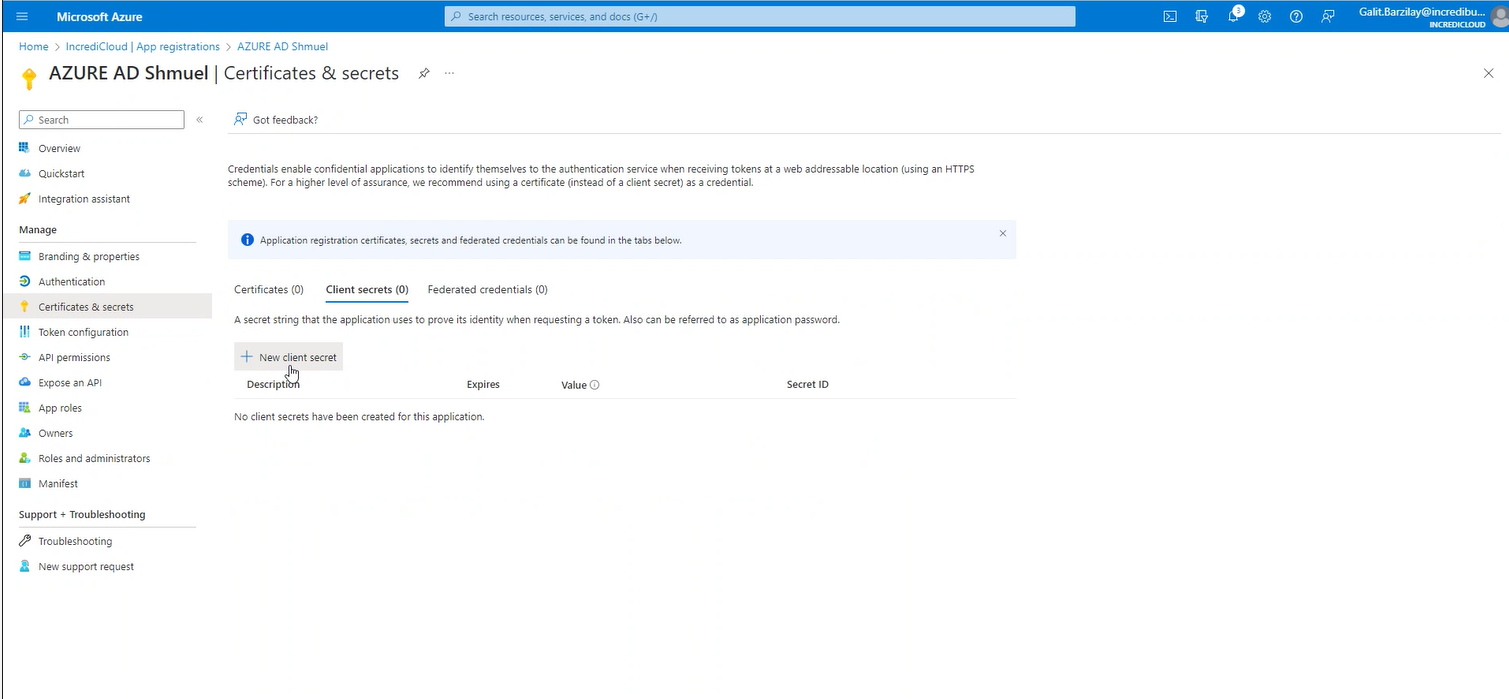
In the Certificates and Secrets area, create a New client secret.
-
Copy and save the value for the Secret. This value will be hidden if you leave this screen without copying it.
-
In Incredibuild, go to Settings > General > User Authentication and click Disabled.
-
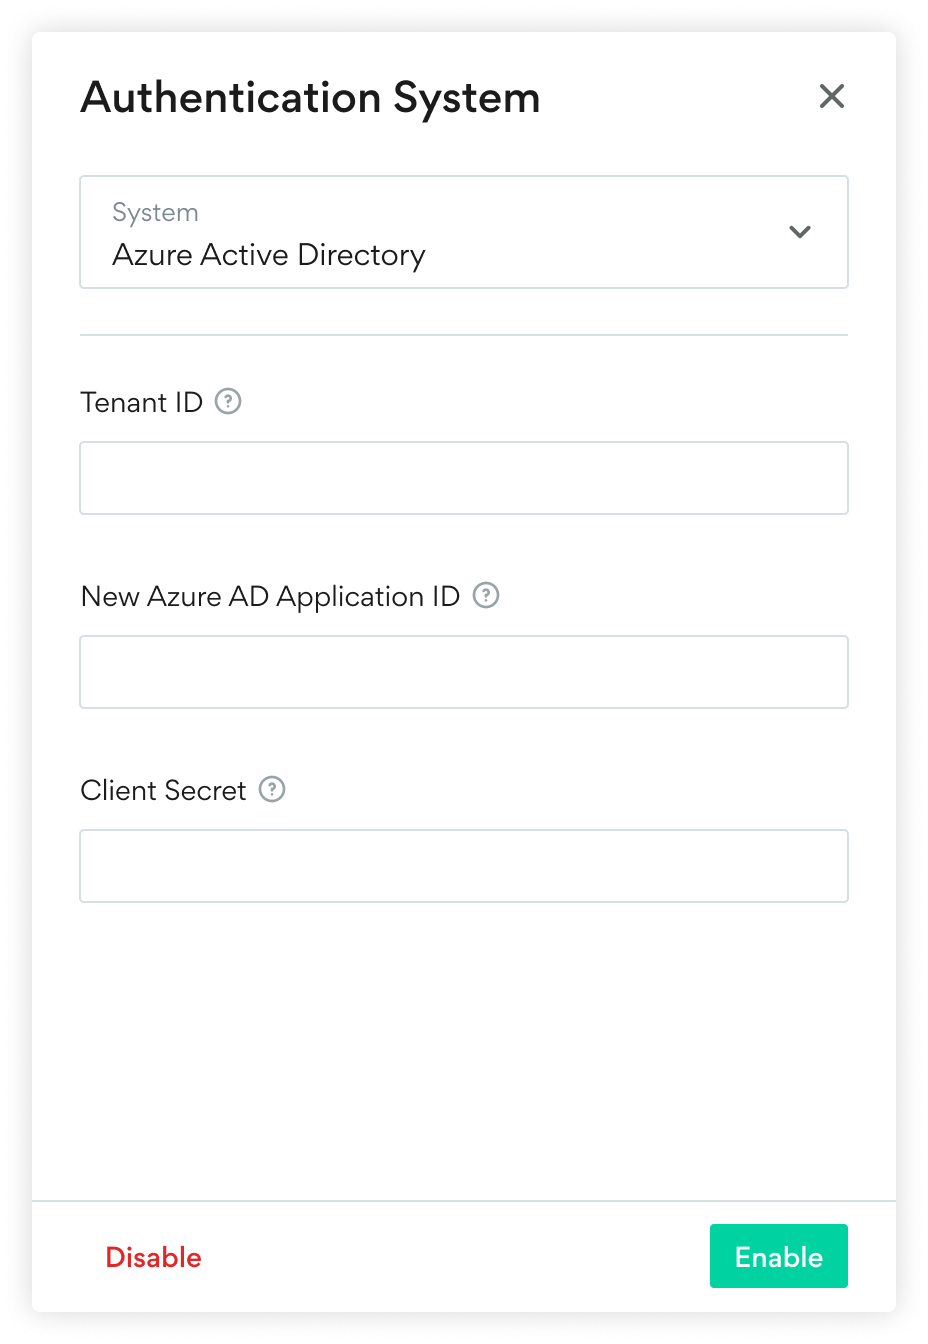
Enter the settings for your Microsoft Entra ID account:
-
You can add as many user groups as you want in Incredibuild and assign them permissions:
Editing Settings in the Integration
If you want to change any settings after enabling the integration, you need to disable and then re-enable the integration as follows:
-
In Incredibuild, go to Settings > General > User Authentication and click the User Authentication area.
-
In the settings window, click Disable.
-
Enable the integration again and change the settings as desired.
Logging in to Incredibuild
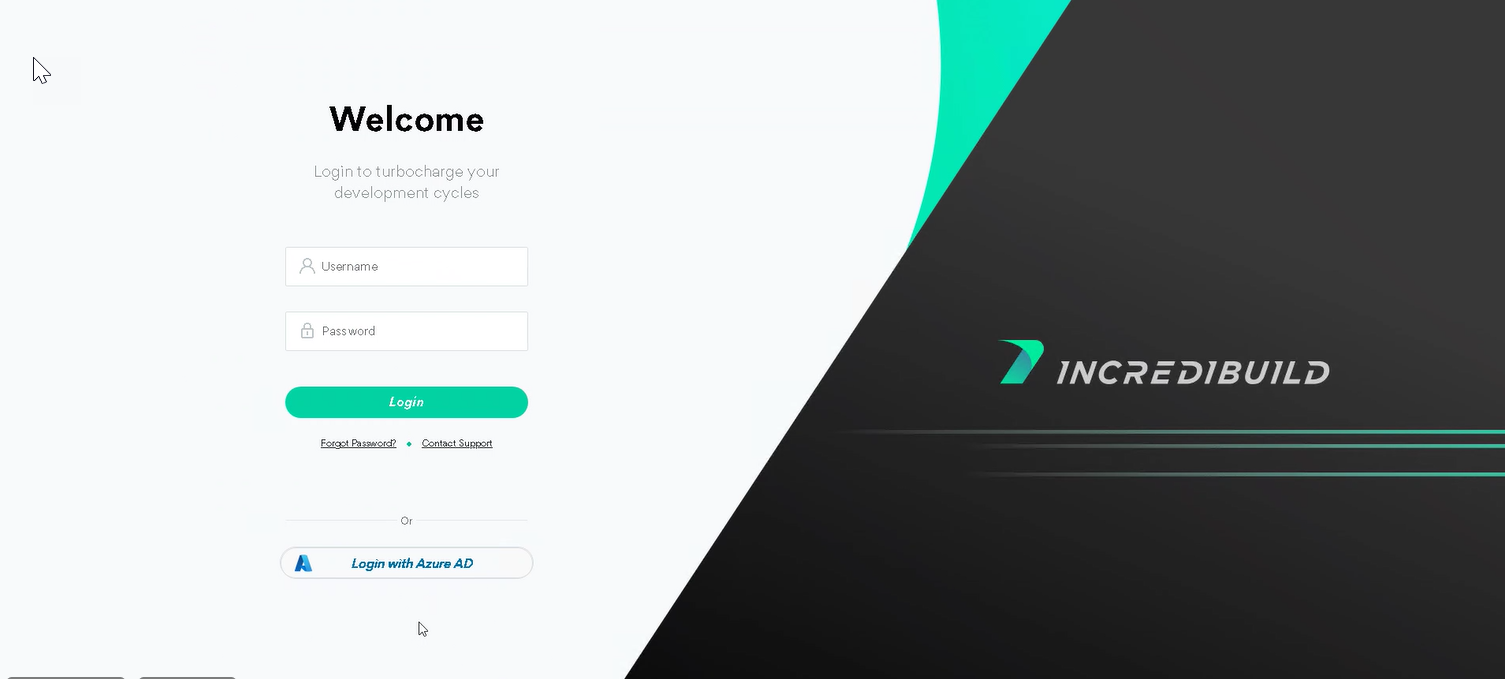
For Active Directory users, the Incredibuild login screen is the standard login screen. Users enter the credentials for either an Active Directory user, or an Incredibuild user with Grid Admin permissions.
If there are two users with the same name, one in Active Directory and one in Incredibuild with Grid Admin permissions, Incredibuild uses the local user. If the credentials do not match the local user, Incredibuild will check the user defined in your external user management system.
For Microsoft Entra ID users, they should click the Login with Azure AD button and then enter their credentials in the popup. The standard login button is for local Incredibuild users with Grid Admin permissions.
Supported User Management Systems
-
Microsoft Entra ID (previously known as Azure Active Directory)
-
Active Directory with LDAP protocol
Troubleshooting
Cannot Connect to User Management System
If you can’t connect to your external user management system, Incredibuild will not be able to validate your users and allow them to log in. You can log in with a local Incredibuild user with Grid Admin permissions. If you do not have these credentials, see Forgot Username or Password.
If necessary, you can then disable the integration and manage users directly in Incredibuild.
