Enable Spot Instances
When using Spot instances, you get Access to unused Cloud compute at deep discounts compared with standard machines. Incredibuild lets you decide if you want to use Spot instances in your cloud environment.
How Does It Work?
Once you toggle the spot option in Incredibuild (IB), executed jobs will be broken up to tasks to be processed in parallel. Each task will be executed as follows:
-
Request - The Initiator (developer, CI etc) execute a workload, IB will request a spot instance at the lowest available (or as The Cloud vendor refers to it “current”) market price on the customer’s behalf.
-
Provisioning – Once the spot instance is created and launched, IB will start provisioning according to the job on hand.
-
Spot Interruption recovery – when spot instance is being interrupted by the Cloud vendor, IB “gracefully” recovers by setting the interruption behavior to “stop”, so that the instance retries to launch with the persistent volume as soon as the type is available in the selected region. IB then starts a new spot instance with its storage volume and existing IB Cache to resume the task’s processing.
-
Completion – Once the job has completed, files get transferred back to the job initiator. The spot machine is retained in case it is needed within the same hour at no extra cost (AWS bills spot resources hourly). If the machine is not needed it is terminated 5 minutes before the hour is up.
To learn more, see the AWS documentation on Best Practices for EC2 Spot.
How to Enable Spot:
In the Cloud Settings, go to Resource Management and select Use Spot Instances.
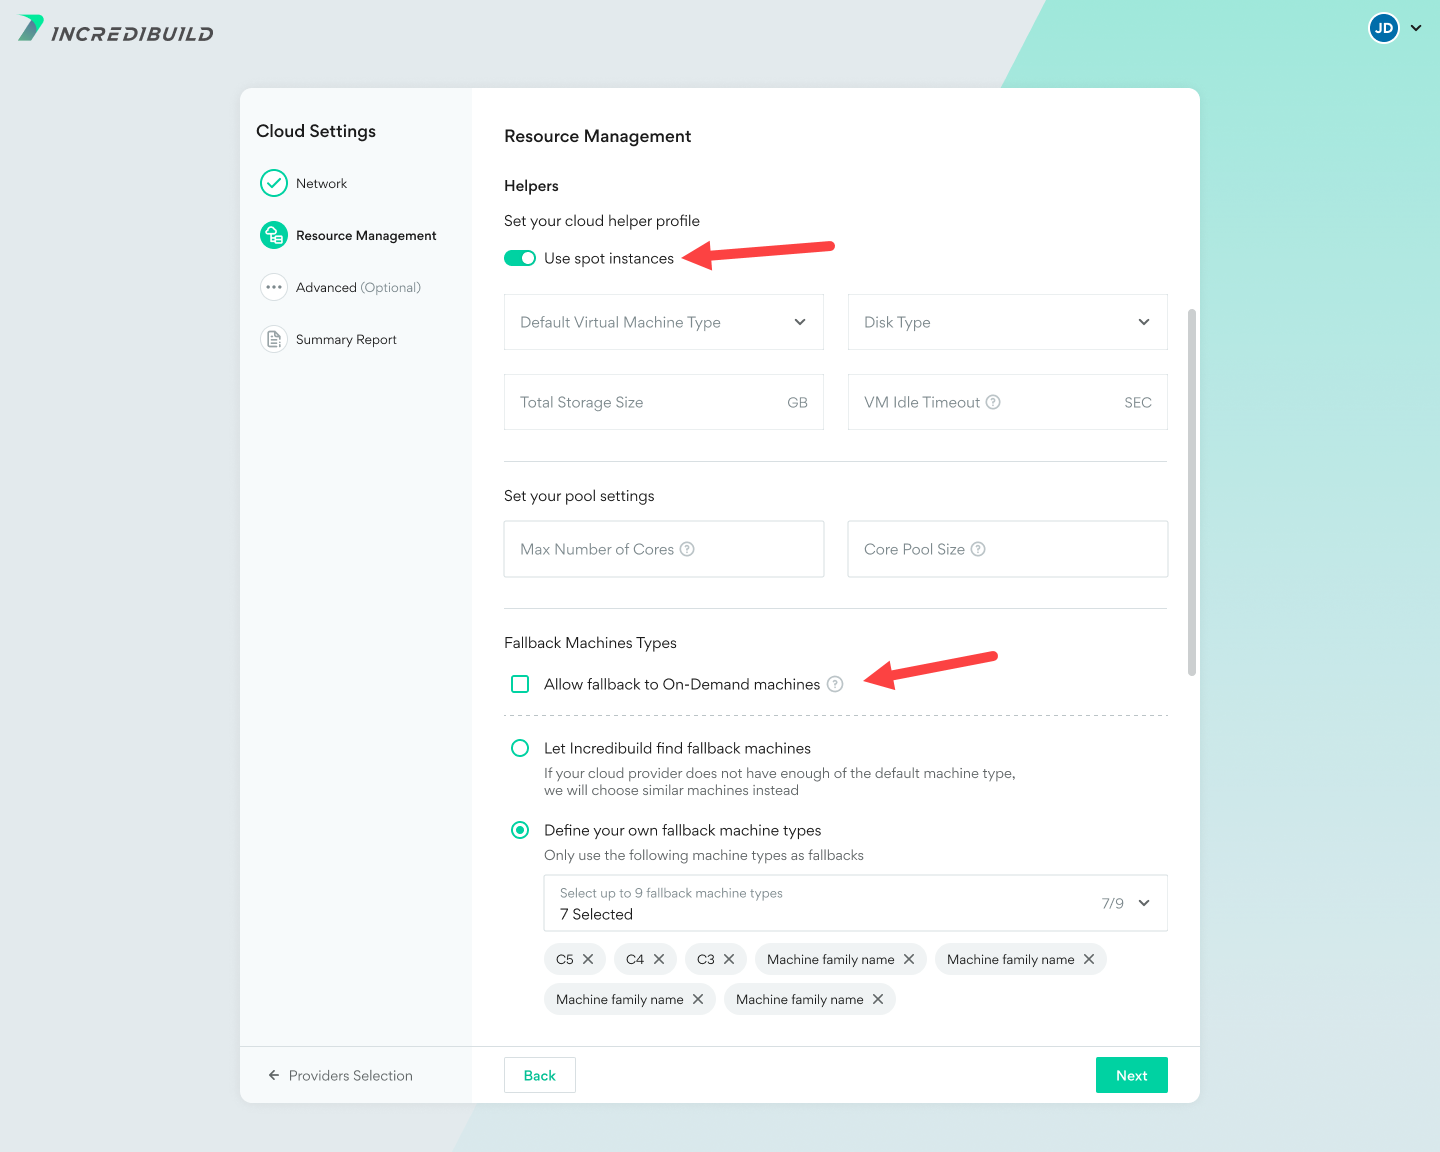
You can also enable Incredibuild to use On-Demand (non-spot) machines if no Spot machines are available using the checkbox in the Fallback Machine Types area.
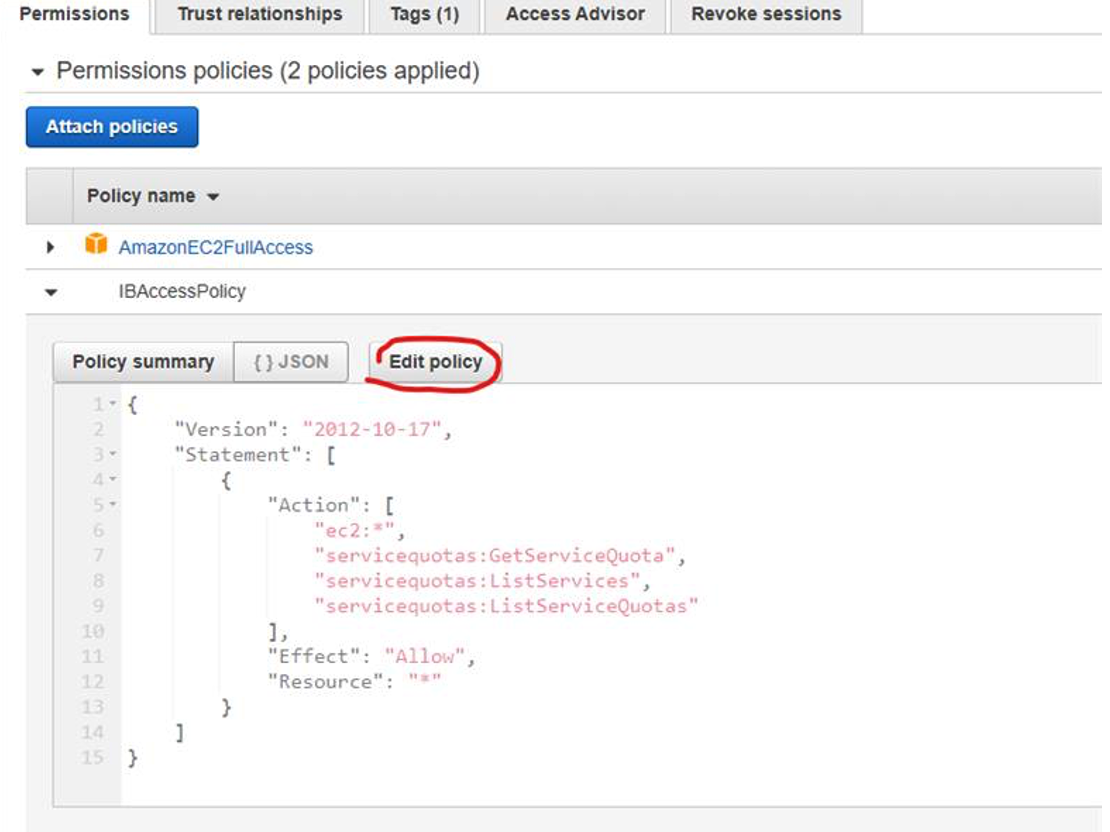
If you are using Azure, no additional steps are needed. If you are using AWS, you need to update the role permission definition of the role created in AWS IAM service:
-
If you haven't done so already, create a role.
-
In your AWS Portal, go to the IAM service.
-
Select the Roles category
-
Select the role they created for Incredibuild Cloud Solution
-
Go to the tab ‘permissions’ – select your policy, view json and click “edit policy”
-
Replace with the code with the following:

{
"Version": "2012-10-17",

"Statement": [
          {
            "Action": [
                    "ec2:*",
                    "servicequotas:GetServiceQuota",
                    "servicequotas:ListServices",
                    "servicequotas:ListServiceQuotas"
                ],
                "Effect": "Allow",
                "Resource": "*"
            },
            {
                "Effect": "Allow",
                "Action": "iam:CreateServiceLinkedRole",
                "Resource": "*",
                "Condition": {
                    "StringEquals": {
                        "iam:AWSServiceName": [
                            "spot.amazonaws.com"
                        ]
                    }
                }
            }
        ]
    }
Track Your Machine Cost when using Spot:
To track and view the discounts and your Cloud machine cost , we recommend using Tags. For details, see the Advanced tab of the Cloud Settings.
AWS Customers:
To find Your Machine cost by using the Tags, you must enable the "cost allocation tags" on your AWS account. Then navigate to the “Cost Explorer”. For details, see the AWS documentation. You can find more information about viewing the actual machine cost here and here.
Azure Customers:
You can find the information about viewing the actual machine cost here.