

- Standard Av2 Family
- Standard DSv3 Family
- Standard ESv3 Family
- Standard FSv2 Family
Finding and increasing the core quota of a region:
- Sign into Azure portal with the same account you will use for Incredibuild Cloud:https://portal.azure.com/#home
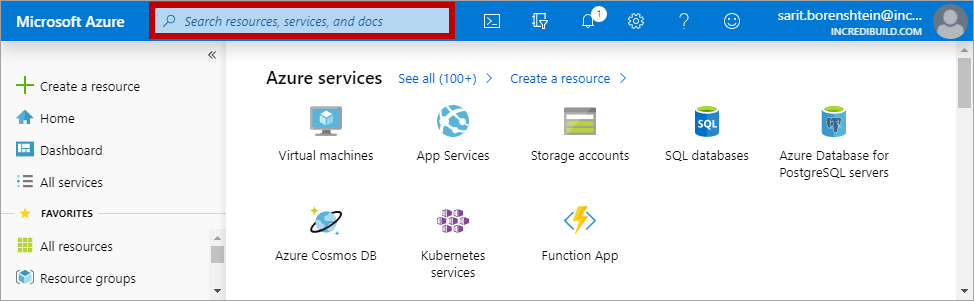
- Open the Subscriptions page. You can use the Search box on the upper bar to find the requested page:
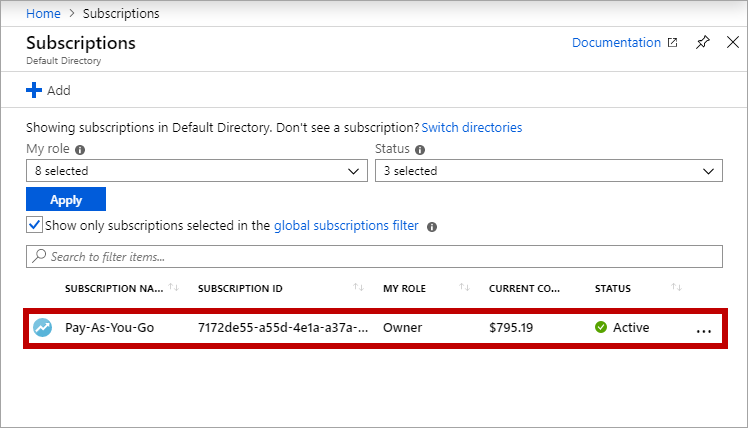
- On the Subscriptions page, select the subscription whose quota you want to find:
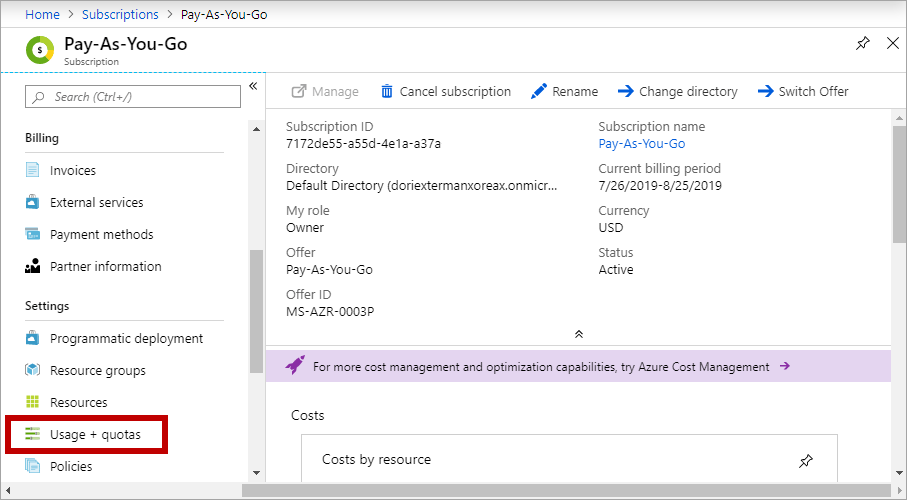
- On the selected subscription page, select Usage + quotas:
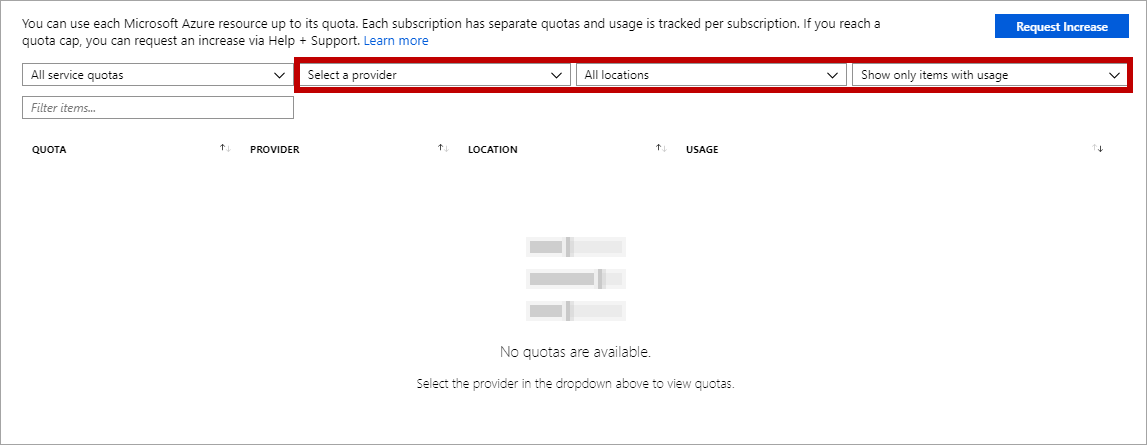
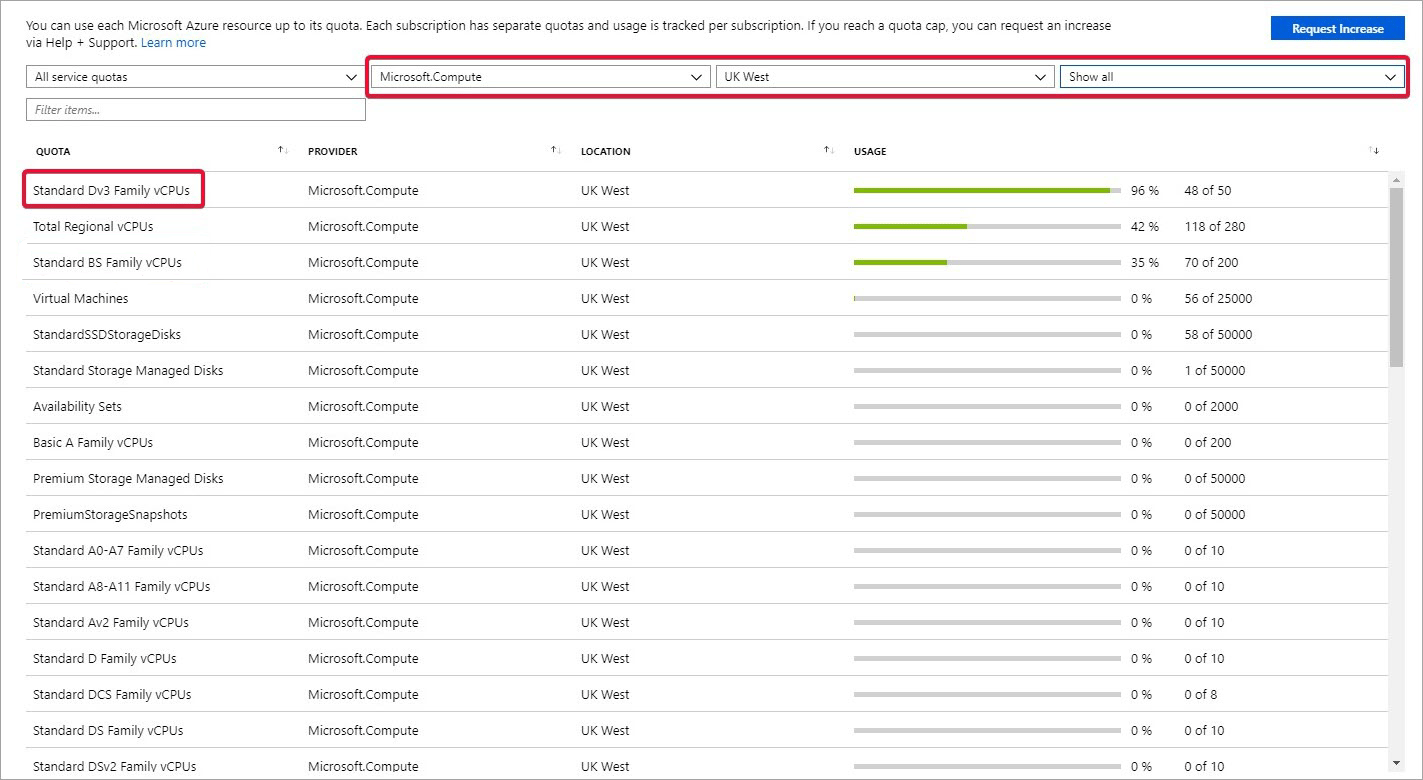
- On the Usage + quotas section, search for the current quota of your chosen region by using the Usage + quotas filters as follows:- Select a provider – select Microsoft. Compute.- All locations – select the region you will use for Incredibuild Cloud.- Show only items with usage – select Show all.
-
Once the results appear, on the QUOTA column locate the vCPU whose quota you want to change.
- For low costs and cost-performance optimization we recommend using the Standard FSv2 Family vCPUs.
- Each quota limit refers to a specific Azure region and a specific Family vCPUs, as described in Step 10 below.
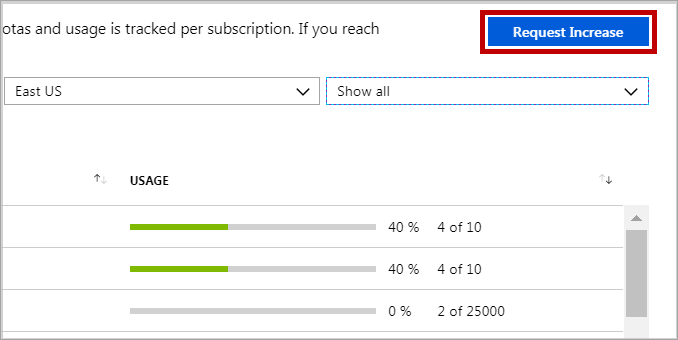
- To increase the quota limit of cores for this region, click the Request Increase button on the upper right corner:
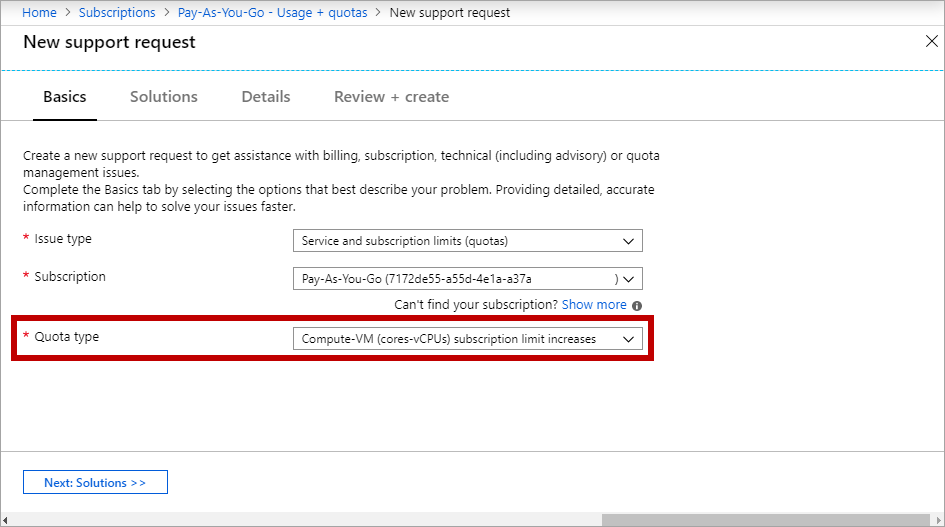
- On the New support request page – Basics step, open the Quota type drop-down list and select Compute-VM (CORES-VCPUs) subscription limit increases. Then, click the Next: Solutions button:
- On the New support request page - Details step, click the Provide details option to open the Quota details pane:
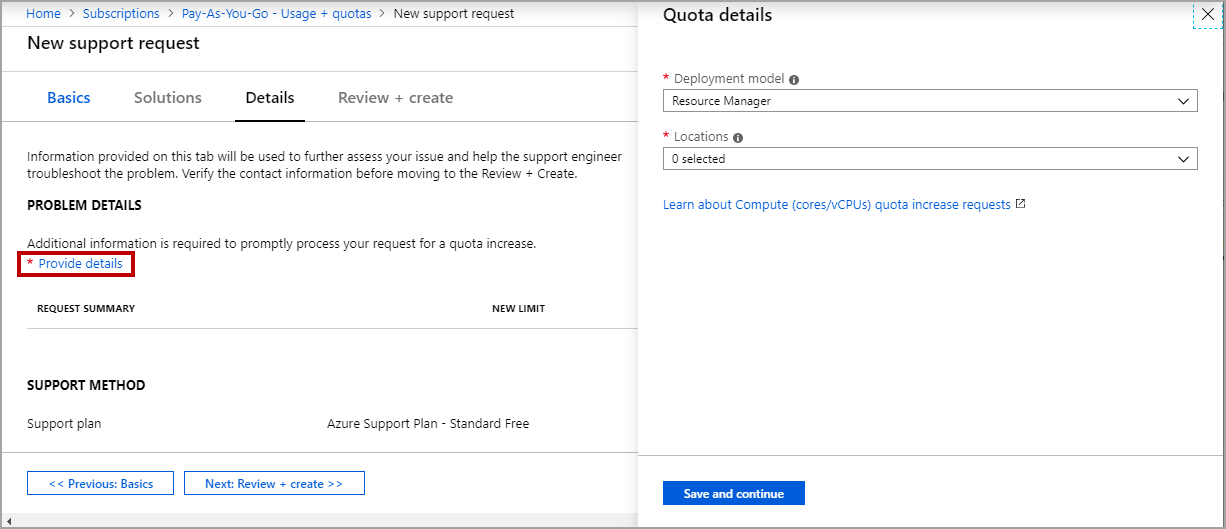
- On the Quota details pane, set the following: - Deployment model – select Resource Manager. - Location - select the region where the VMs of Incredibuild Cloud will run.- SKU family – select he family of VMs you want to use. - SKU Series - NEW LIMIT box – enter the number of cores that will serve as the new limit. This number should not be lower than the value of the Total Cores Limit parameter of the solution settings, which is set during the activation procedure. The Total Cores Limit parameter defines the maximum number of cores on the cloud that can be allocated to the execution of tasks. Info: For more information on the Total Cores Limit parameter, see: Incredibuild Cloud Settings.
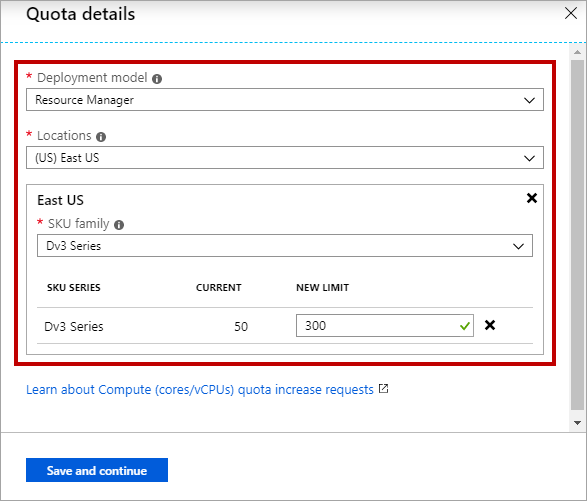
- After you set all the parameters, click the Save and Continue button.The Quota details pane is closed, and you return to the Details section.
- On the New support request page - Details section, fill in the mandatory fields. You can also change the Severity level of your request.
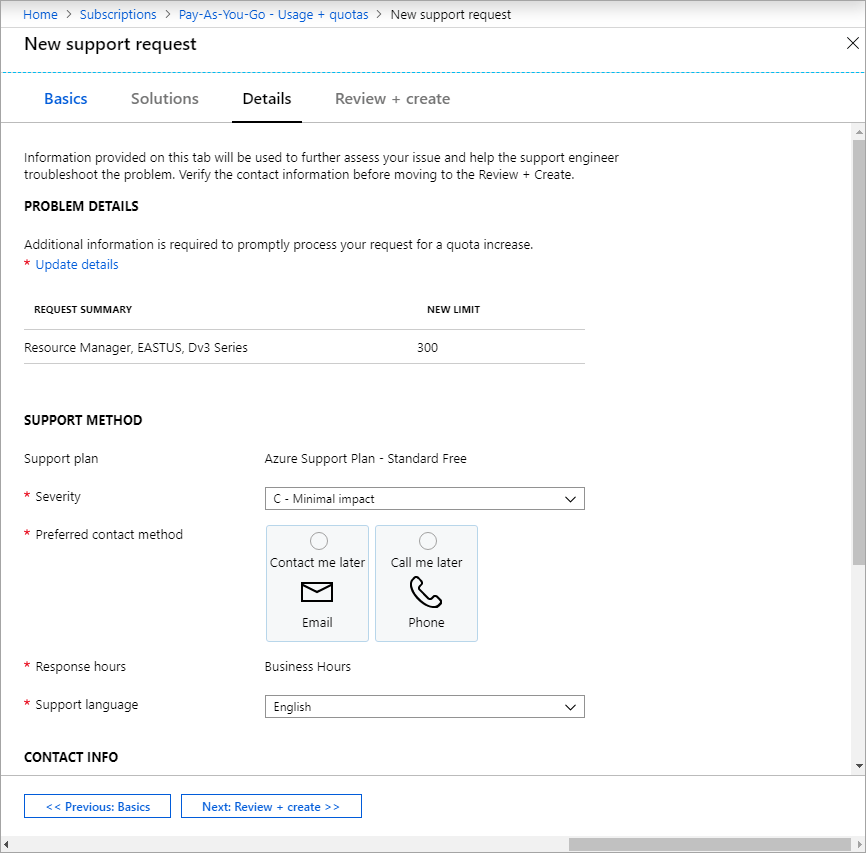
- Once you set all the details of your request, click the Next: Review – create button. The Review + create page appears, allowing you to review the details of your request before sending it to Azure.
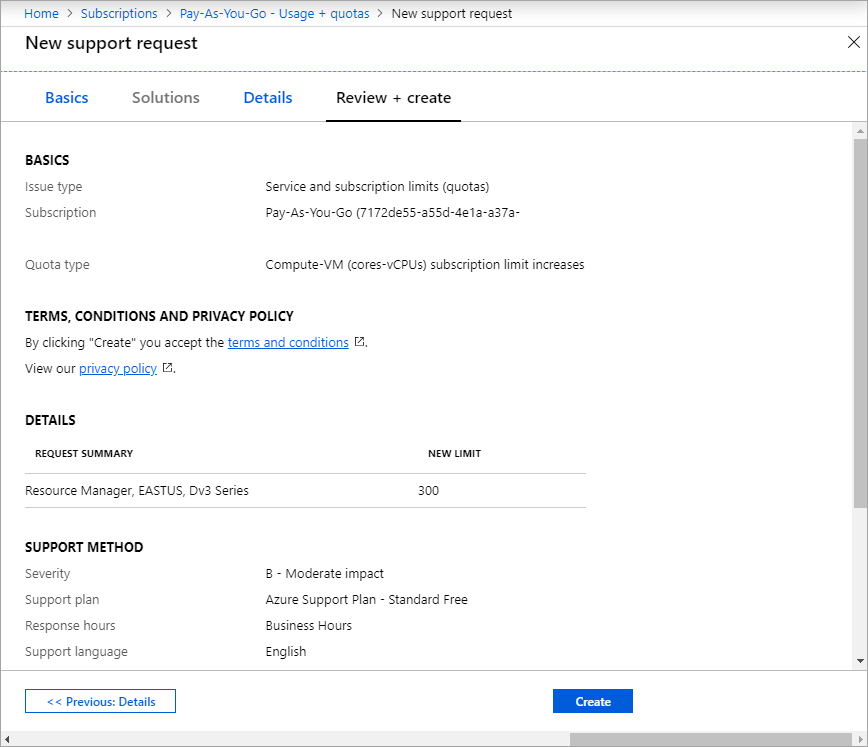
- Review the details of your request, and click the Create button to send it to Azure Support. Wait for the confirmation from Azure of the quota increase, before activating Incredibuild Cloud solution.